Well, after a 3 month (gasp!) hiatus, I'm finally back in blogging action. After the dealing with the dropped laptop/damaged hard drive incident, the busy summer season jumped into full swing in May with planting the garden, my birthday, college reunion, many birthday celebrations for family and friends, plus training for a 100 mile bike ride taking place next weekend and the Chicago Marathon on October 7th. Add to that a month and a half of appointments and tests to diagnose a medical problem I was having, plus many other weekend activities, and you can see why I've been absent from the blogosphere. But never fear, I've still been doing little projects in the meantime and am working on getting some posts together to share with you, specifically a little how-to on biking to work and a breakdown of projects we did for our porch makeover.
For now, I'll be heading to the dark side.
But not that one. This one.
I am FINALLY painting our master bedroom! Specifically, Antique Tin by Behr. Maybe it's just me, but I love feeling like I'm sleeping in a dark, cozy cave. I was looking for something that was navy, but muted a bit with grey so that it would more soothing and calm versus a bluer shade that might read too saturated on the walls. After the swatches had been hanging in our room for, oh, you know, only a year, I just couldn't take the mint green walls anymore. Remember this from the home tour?
Well, it should probably be labeled "Now-ish" because I couldn't wake up to the pink floral valances one more day and got rid of them long ago. However, everything else is pretty much the same (including the paint swatches). The color we picked is the top swatch on the wall. In addition to painting, I plan to do some caulking around the basboard and windows where there are some gaps, clean the trim (and possibly paint it), and switch out the bedding and window treatments. I already have a cheery, new quilt, so between that and painting, it should make a big difference until I can finish the rest. Plus, it will keep me occupied and out of the way so Darren can have some guy time while he hosts poker at our house tonight.
Let the Friday night painting extravaganza begin! I'll be back soon with updates!
Particularly, things that being with the letter H: 'hard drive' and 'hard way.' Used in a sentence: "Corrie has learned the hard way by not backing up her hard drive."
Due to an accidental incident involving my laptop being dropped (not by me), and failure to back up any data during the year I've owned it (all my fault), I was without a computer for much of the month of April...hence my absence from blogland. The good news is that my amazing friend Jeff happened to have an old hard drive sitting in his closet from a mis-shipment awhile back and gave it to me for free. My hero. The bad news is that I probably can't recover (or afford to recover) any of my data, which means I have lost tons of pictures of projects we've done and didn't get a chance to post about. These were some of the more time consuming projects, which would involve long posts that I just hadn't had time to type up yet. They were: installing a kitchen cabinet, restaining our patio furniture, DIY baby shower gifts (nursing cover, pacifier clips, baby headbands), and replacing pipes/installing a drain in the walkway outside our back door. Perhaps the biggest loss - and most disappointing loss of pictures - was from a an electrical project we did with my dad in which we ran wiring for a new outlet in the dining room and two electrical boxes in the half bath, allowing us to install a wall sconce and light switch. (The half bath formerly had a ceiling light with a pull string that you had to pull horizontally to turn on - not easy for someone who is 5'2".) Not only was it our first major project, but I had planned to rely on the pictures and documented steps as a reference for future electrical work.
That - relying on pictures and documentation of completed projects to replicate or help with future projects - is really the core purpose of why I started this blog in the first place. Even though the results are physically present in my home or as gifts in my friend's home, the processes are lost. And to me, those processes carry just as much value.
And so my friends, though I am saddened at the loss of all that I wanted to share with you (and keep for reference), I'm forging ahead with some new projects. I am also thanking my lucky stars that I only had one year's worth of data on my computer. Though a lot of bookmarked recipes, project ideas, and house inspiration stuff was lost, most pictures from life events during that time are on Facebook, most of my music is on cd, my iPod or my old desktop in the attic, and important financial documents from my taxes and house purchase are not gone forever. Things could have been much worse.
The moral of today's story? Go out and buy an external hard drive, then back up all your info. Or if you already back up your info, do it more often...You never know when someone might drop your laptop and everything could be gone in an instant!
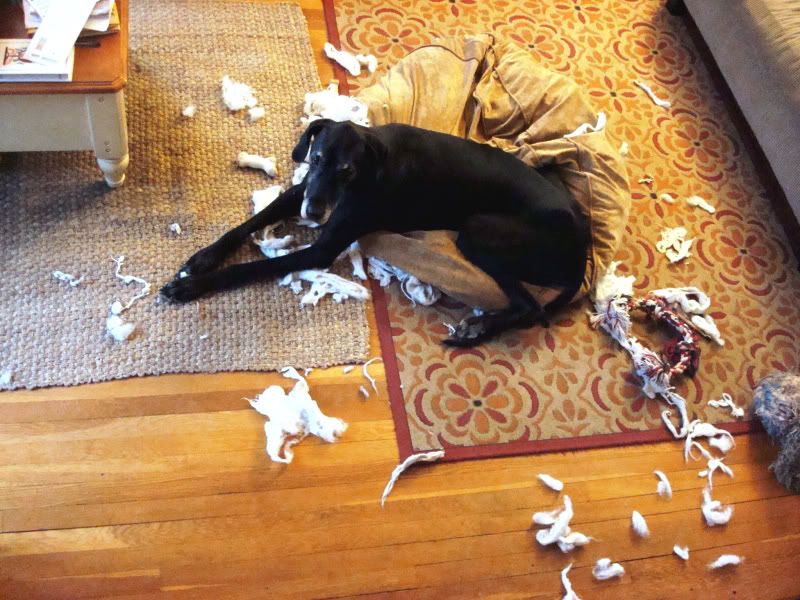
Last Tuesday, you got a little glimpse of the 'party' in the living room that Remy had with her dog bed. As you might recall, we came home the Friday before to find this scene...
...complete with not so innocent face. And so, an 'emergency' dog bed project was born. As I mentioned in my first post, this whole situation wasn't exactly a surprise. Remy has ripped holes in her bed (and I've sewn them) twice already, so I knew that my temporary fixes weren't going to last long. A number of people pointed out to me that Costco has large dog beds for about $40, but apart from not having a Costco membership, anything I've seen for that price either wasn't big enough, didn't have a separate washable cover, or had very thin material...meaning it definitely wouldn't last almost 5 years like the first one did. Especially with this kind of action (to the tune of "The Entertainer" so you don't have to listen to our tv...it always pops into my head when she does this):
That was a little more low-key than usual. Anyway, I decided that DIY-ing a new bed for Remy, reusing the current filling plus adding some new fluff, would be more economical and durable than anything I could buy at a store. Awhile back, I found this tutorial for a kid's floor cushion from Living With Punks.
It was essentially the same shape as Remy's bed, just with different dimensions, so I figured it would be a good guideline for doggy bed assembly. I pinned it on Pintrest to save for future reference.
I also pinned this doggy-bed-related-but-otherwise-irrelevant picture of an Irish Wolfhoud, which made me laugh because it perfectly sums up Remy's relationship with other dogs. And I love Irish Wolfhounds.
Oooo, I just want to snuggle him! ...Er, Let's get on with the bed making.
I wanted Remy's bed to be both durable and aesthetically pleasing because - let's be honest - given its size, it might as well be a major focal point in our living room's decor. So the supplies I picked up were:
4 yards of seafoam-colored indoor/outdoor fabric with a subtle scroll print from Joann Fabrics for $39.96 with a 50% discount. (It's similar in color to the fabric on my blue pillows, plus its outdoor durability means it's moisture and stain resistant, easy to clean, and stands up to heavy wear.)
Three 12 ounce bags of shredded foam (to add to the existing filling) for $8.38 with various coupons. (Joann Fabrics will accept multiple coupons in one transaction so I always have them scan the printouts to see what will work.)
Thread in a coordinating color, which I already had
Total cost: $48.34 (less than half the cost of her original bed when I purchased it almost 5 years ago)
The foam was very static-y and had lots of tiny pieces, so I decided to sew closed some old t-shirts with the foam inside, plus one additional t-shirt full of the old filling. I literally just sewed the arm and neck holes closed, dumped a bag of foam in each shirt, then sewed the bottom of the shirt closed.
The idea is that when it comes time to wash her bed, most of the filling (at least the smaller stuff) will be contained in 'bolsters' (the t-shirts) so that we don't have to deal with this :
You could easily sew together one giant bolster, but I didn't want to spend more money on fabric when I could just use t-shirts.
While Remy was swimming in a sea of stuffing, I was busy cutting apart her old bed along its seams, which left me with three pieces, much like the pieces in the floor cushion tutorial: the top and bottom circles (each 48 inches in diameter) plus the side piece (6 inches wide and about 154 inches long). The side piece was actually made up of three separate strips of fabric, since one of the strips contained a zipper. Because I also planned to add a zipper (and my fabric wasn't wide enough to cut one long strip), I determined the measurements of the three almost-equal strips were 51in.+51in.+52in.=154inches total (the circumference of the bed). I things are getting a little math-y, so I hope you're still following!
I used the old bed pieces to trace the top circle onto the new fabric, measuring my pencil line 1 inch out to accommodate the seam allowance.
I cut out my new top circle and then traced it on the fabric to make the bottom circle.
Then I measured, drew, and cut out the strips that would form my side piece, adding in 1 inch for seam allowance. Two strips measured 52in. x 7in. and the zipper piece (which I then cut in half to insert the zipper) was 53in. x 8in.
The reason the zipper piece was 8in. was because I had to account for seams to sew in the zipper, plus seams to attach it to the top and bottom circles (2 sets of seams adds 2 inches). Here's a diagram that better illustrates the pieces:
The first piece I sewed was the zipper, following these instructions, though I kind of half-a**ed it by not doing a basting stitch, using glue, or a zipper foot. Oh, and I bought a separating zipper (the kind you would have on a sweatshirt) instead of a regular one...so basically, it's amazing this thing even turned out ok, especially since I was a zipper-sewing virgin. One thing to note is that I stitched around the whole thing twice for extra reinforcement.
With the zipper piece done (are you tired of me saying "zipper" yet?), it was time to attach all the side pieces together. This required some quick pinning, then sewing the ends of all three pieces, right sides (aka patterned sides) facing, into one long strip.
Then I joined the ends of the strip and sewed those together to make a continuous circle. Before proceeding, I pressed all my seams so that my fabric was nice and flat.
Next step was to attach the side piece to the top circle. I laid the circle out, flat on the ground, with the right side facing up. Laying the side piece on top with right sides facing together, I pinned the outer edge of the side piece to the outer edge of the circle. REWIND. Let me note that I actually did this completely wrong the first time. Not only did I waste an entire night after work incorrectly pinning and double-sewing (twice for reinforcement of course), but then I wasted an additional work night solely ripping seams out to redo it. You live and you learn I guess. So let's learn from my stupidity.
Wrong way:
Right way:
Glad we've got that covered. Evening three of dog bed making was when I finally sewed the side piece and first circle together for the second and last time. After two evenings of issues, I couldn't seem to excuse myself from another. Let me preface this by saying that anyone who has ever used a sewing machine knows that there is an evil spirit lurking inside every single one. Not.Even.Kidding. I think every time I've ever used my sewing machine for a project, at least one thing happens that leaves me cursing at it. Maybe it's because Greta the Mean Green Sewing Machine has been around since the 1950s and has a short temper.
Or it could just be user error. Either way, I can't imagine I'm the only one (besides Sherry at Young House Love) who has these problems. At least my machine has kept me from subscribing to the Humpty Dumpty school of hard knocks - I've learned how to put her all back together again.
So I guess what I'm getting to is my night #3 incident.
Enter stage left: blood blister/cut/thumb nail bruise. Let me tell you. Almost sewing your thumb off is a sure fire way to instill a fear of sewing machines in any DIY- savvy person. I hope the fact that it still hurts and I can barely button my own buttons a week later is enough to convince you to question my sewing abilities never let your fingers get caught up in your sewing bidness. By that I mean, don't feed your fabric from the front even when you know it's a bad idea but think it will be ok. Because it won't.
At this point, my blood, sweat, and almost-tears were officially part of Remy's dog bed. I took a band-aid break and Darren asked, "So, do you think you'll finish tonight so Remy has her bed while we're at work tomorrow?" I think I muttered something along the lines of "Remy can shove it and so can this #*$% bed." (Sorry Remy, I take it all back now. Please don't sit on me.)
But actually, I did finish that night, after one last step. Sewing the second circle to the other edge of the side piece (which was now attached to the first circle on one edge). I did it the same way as the first circle, by laying the pieces right sides facing and pinning around the edges. I had to bunch some of the top circle's fabric into the middle to get the outer edges to line up flat.
Then I sewed around the edges twice for reinforcement. Because the bed has a zipper, I didn't need to worry about leaving an opening in the stitching in order to turn the bed right-side-out. Unzip and it was done.
All that was left was to stuff and fluff with the t-shirt 'bolsters' and the old reused filling.
Ta daaa!
No fancy cording around the edges like the floor pillows on Pinterest had (it would've added too much to the cost), but that's ok. It's just a dog bed. And apparently a comfy one at that.
Oh, hey Remy. Looks like you're having some issues with your bed. Sounds like a personal problem.
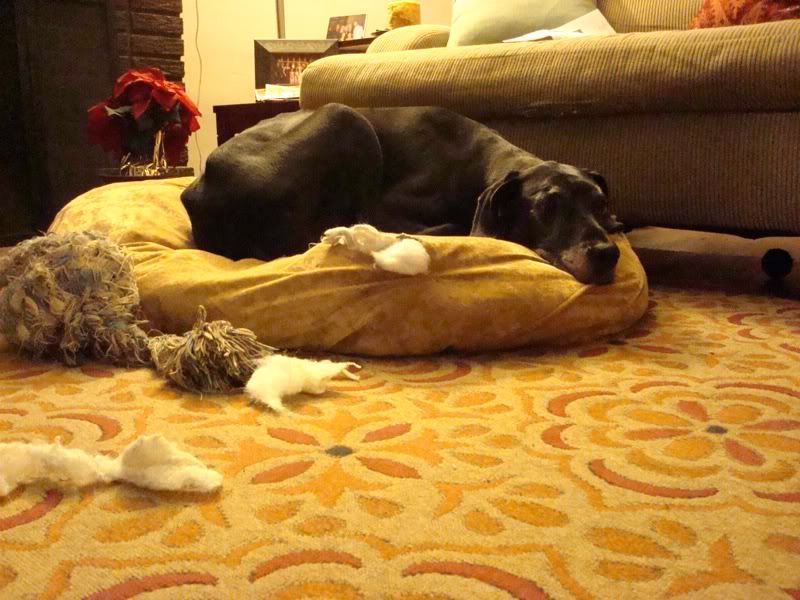
Actually, it's been a bit of an ongoing problem - like 6 months ongoing - that started out more like this (the raggedy thing next to her is a giant knotted ball of rope aka one of her toys):
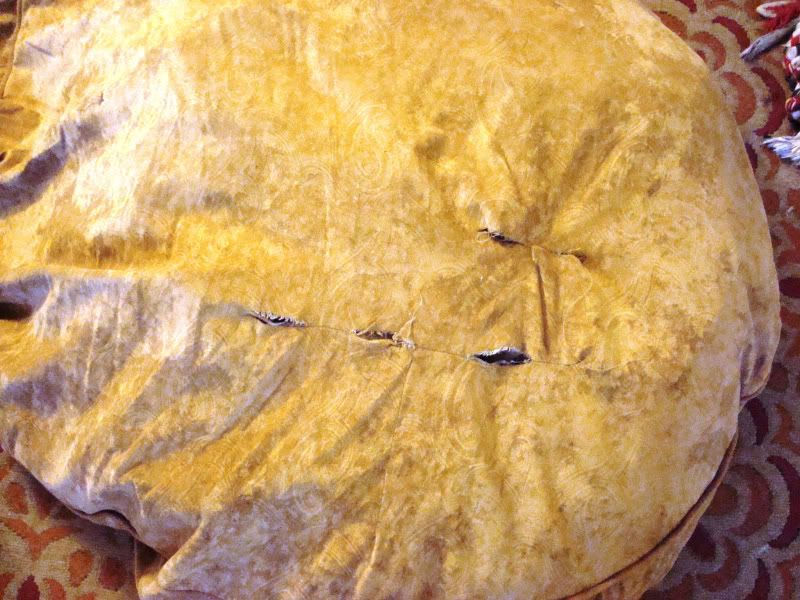
Which resulted from these (giant holes in her bed that I have already sewn closed two times):
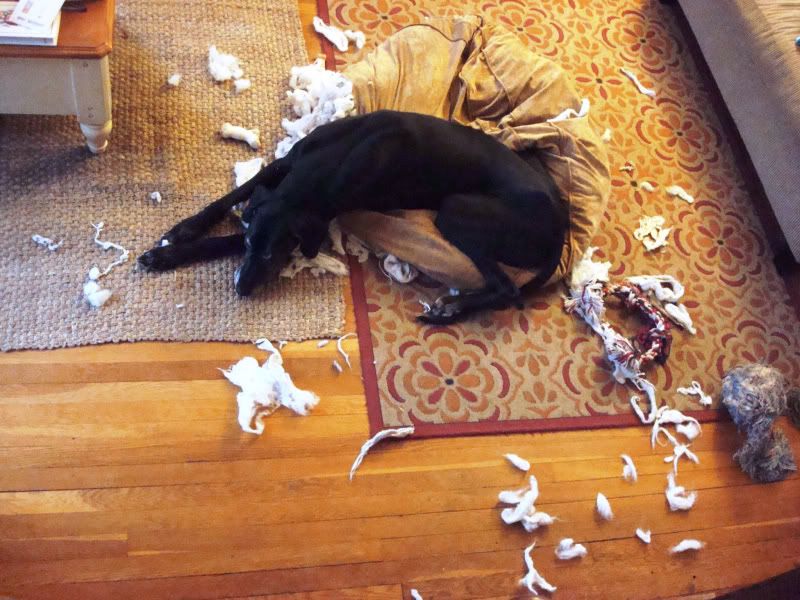
Which brings us back to this (the holes are ripping open for the third time):
As you can see, underneath her there is a giant hole about 18 inches wide - among other smaller holes - spewing the contents of her bed all over our living room.
I don't want to give her any bad street cred, though. This didn't result from her chewing the bed - she's never been much of a chewer-of-things. Despite being a good dog, she isn't exactly a normal dog when it comes to laying down. Apparently, she is on a life-long quest for Ultimate Bed Fluffyness. The quest takes shape in one of two forms. Either stomp-circling her bed before she lays down, as a normal dog would do...although, as you can see in this video, her circling lasts an obscenely long time. (Sorry for the darkness. Even with the lights on in our living room it's still not very bright.)
This only captured about 30 seconds of it before my camera died - she laid down shortly after - but she sometimes does this for up to 2 minutes. Destructive, no. Weird, yes. Humorous, maybe (probably more so in person).
And then there is the other way, that in which the beast is unleashed. Apparently disgruntled by its location or lack of fluff, Remy kicks her bed around with her feet, like a kid trying to juggle a soccer ball. She tromps and flops it across the living room and back. Grabs it in her mouth and tries to toss it. Flips it in half. I yell. She stares. Repeat. Her bed becomes less layable than it was in the first place. This inevitably ends with me grabbing her bed, fluffing it, and telling her to lay down on it. She looks at me like I ruined everything, disdainfully obeys, and the sometimes gets back up to try all over again. It's quite a dramatic affair. I only wish I had a video to show you, but since we try to discourage her bed abuse ("ultimate comfort seeking" is probably what she would call it), I don't have any live-action-proof.
You now understand how her poor, abused bed has been left for the third time bleeding of its fluff, some of which is gone forever. The whole bed has become somewhat deflated, which only perpetuates Remy's need for more fluff. It's like an addition for her, I think.
Ok, Remy. Three strikes. You win. You get a new bed.
I've been anticipating this for some time. Because dog beds of the same quality and size that she currently has are hard to find and would cost me at least $100 to buy, I've had some fabric at the ready to make her a new one for much cheaper.
So, I suppose this isn't a real emergency, but considering we have hardwood floors and Remy isn't allowed on the furniture, I'd like to complete her bed as soon as possible. I'm using her old bed as the template and reusing the old stuffing, plus adding more. Work has already started - not without issues - so I will be back later this week with a full report.
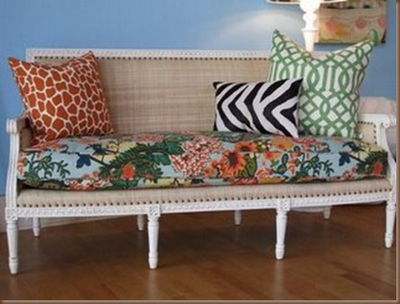
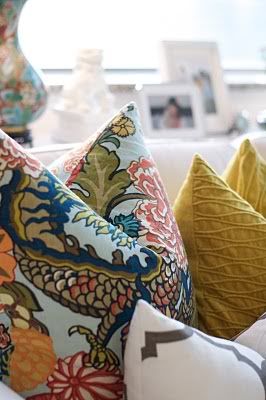
Couldn't you just see it making a home as a pillow on my couch?
The seemingly random pattern that's so easy to pair with other patterns. That perfect mix of colors found throughout my house. The piece de resistance of my entire first floor. Oh, the places you'll it'll go!
Oh, the drama.
.:Sigh:. But I forgot to mention a minor little detail. This is only a visual love affair for now, because I ain't no sugar momma. Think $140 per yard. Ouch. On top of the price, it's a designer fabric made by Schumacher (whose fabrics I'm obsessed with, by the way) so it's playing hard to get. I've searched Ebay and Etsy but with nothing very reasonable to be found. The best I could find was a pair of pillows made with the fabric (only on one side) for $100. Still way out of my meager DIY budget. And there's nothing comparable that satisfies me.
Soooo for now I suppose I am left to dream. And keep stalking Ebay. And Etsy. And maybe save my pennies. And maybe make some calls to some local fabric/upholstery places to see if they might have any remnants.
And, hey! Any of you out there! Can you help a sister out? Do you or anyone you know have any scraps of this fabric they would be willing to part with? Any idea where I might find some at a bargain price? Chaing Mai in aquamarine. The bane of my existence right now. (Pathetic to say about a piece of fabric, I know. But gosh does it seem so fitting for my house.)
In the meantime, I'm going to focus on finding some orange curtains. Yep, orange. And picking a paint color so we can get our bedroom makeover. It's about to get crazy in here, kids.
Happy (now belated) Valentine's Day, loves! I originally started writing this this post as I was waiting for my valentine to arrive home from basketball on Tuesday, but since we didn't get our downtime together until about 10:30pm that night, I was never able to get the pics into the post. (Notice a trend here? Belated holiday greetings...belated Valentine's greetings...sometimes I suck at life.)
I have to admit...I generally don't go crazy over Valentine's Day. As much as I love decorating for holidays (and in general), Valentine's Day isn't something I go ga-ga about. Maybe it's because I (mostly) hate the color pink. Maybe it's because I don't like how the media seems to tell us that if we aren't buying All The Things for our partner that we don't love them enough. Or maybe I'm just a believer in doing the little things that show you care about your loved ones each day, not just on a day that 'designates' you to do so. Regardless, we don't do fancy dinners, or expensive gifts or grand public gestures of appreciation for Valentine's Day. While I love seeing others become joyful over those things, it's just not our style.
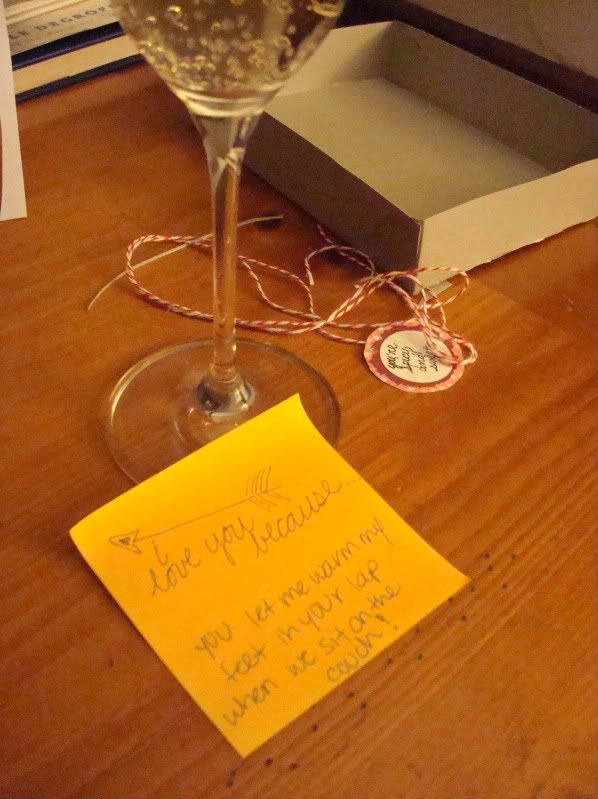
So in true DIY, made-with-love form, I raise a toast of cheap champagne (though not because I think cheaply of you) to you and your valentines, and I bring you our Valentine's Day.
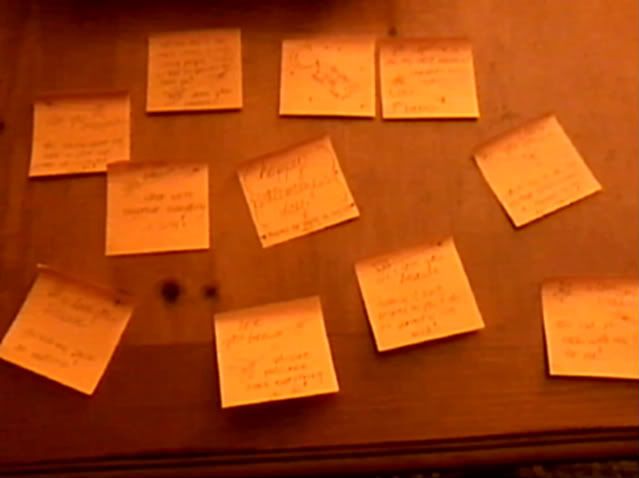
The morning started with Darren waking up to find 12 post it notes I wrote out last night with cupid arrows drawn on them, each saying "I love you because..." with a reason underneath each arrow. The picture did not come out clear at all, probably due to the fact that I took it on my dumbphone non-smartphone while it was still dark out. Knowing that D gets up before me and let's the dog out, I left the post it notes around the house last night in each place he wanders in the morning so that he would find them as he got ready for work. A free and heartfelt way to tell him how much I love the little things he does. Cheesy? Probably. Did he enjoy it? Yes.
I proceeded to indulge myself in chocolate at work, thanks to my lovely coworkers. When Darren picked me up from work, he had a card waiting on the seat for me with an unexpected little gift inside - a Groupon for a wine education class, which we had been eying up last week...and which I didn't have money to buy at the time. We both love wine, but unlike beer, don't know much about it, so it was a great thing for him to gift to both of us. The somewhat-unfortunate twist was that he didn't realize when he bought it last week that the promotional value expired a week later. Meaning, Monday, the day before Valentine's Day. Shady Groupon place and their shady timeline. No big deal though, because the paid amount never expires so we can still use it, but we'll just end up paying the full price when the time comes.
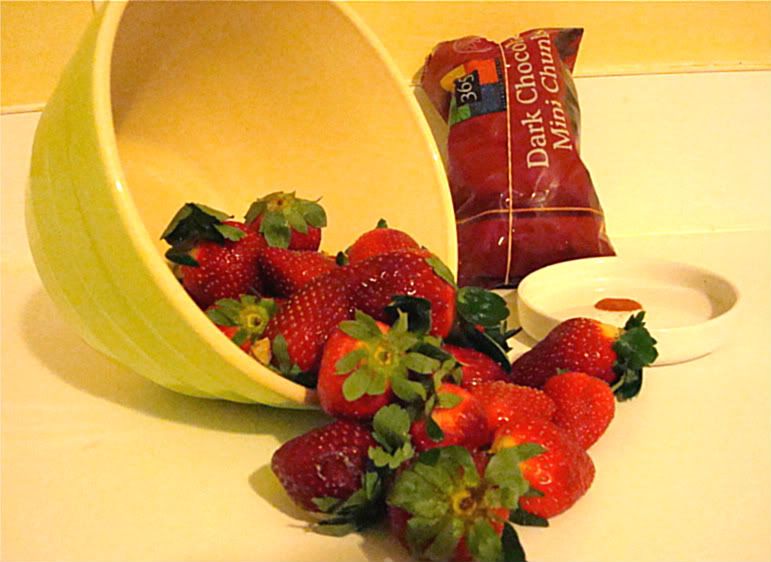
When we got home, we proceeded to make dinner as usual and then Darren ran off to basketball. While he was gone, I decided to take advantage of some leftover dark chocolate we had and make chocolate covered strawberries.
Chocolate covered strawberries are just about one of the easiest desserts you can make. I wanted to jazz them up a little bit by experimenting with some salty/sweet and spicy chocolate combos, so I pulled out some sea salt and cayenne pepper. I dumped a little more than a cup of dark chocolate chunks into a small bowl and heated them in the microwave, stopping to stir every 15 seconds. I know that sounds ridiculous, but if you choose to melt chocolate in the microwave, you must stir it frequently to distribute the heat and keep the chocolate from burning. As long as you obey that rule, microwave melting is much faster than stovetop melting. My plan of attack was to dip a little more than half the strawberries in the regular dark chocolate, then mix the cayenne pepper into the chocolate to do the rest.
Right after dipping in the chocolate and giving a little twist to catch any drips, I placed them on top of a freezer bag to cool and reharden. Normally you would put them on wax paper, but I realized after I started melting the chocolate that we were out. Oops. I gave a little sprinkle of coarsely ground sea salt over the top of some of the dipped strawberries while they were still melty, and left others plain. When I only had about 6 or 8 left to dip, I mixed about 1/8 tsp of cayenne pepper into the dark chocolate and proceeded to coat the rest. Then I quickly sprinkled some cayenne over the tops in order to identify the spiced ones from the regular ones. At this point, many had hardened enough that I could remove them from the wax paper freezer bag and put them on a plate in the frig to chill.
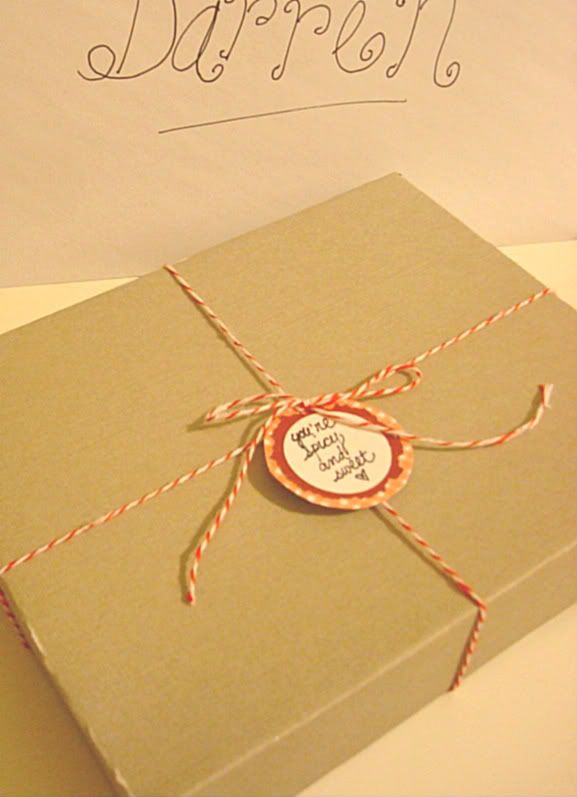
Since I was hoping to present them a little more fancily than "oh hey, check out the plate in the frig," I decided to make a little box to put them in. It was as simple as google-ing "paper box template" and picking one of the many options that popped up. The one I used was from mirkwooddesigns.com, and it was fittingly called "candy box."
When I printed it in it's original size, it looked a bit too small to hold a bunch of strawberries, so I just adjusted my printer settings to 125% and reprinted. It was as simple as tracing the top and bottom pieces on some card stock, cutting them out, folding along the lines, and gluing the corners in place.
Oh, and then filling with strawberries. I did a row of the salty sweet, a row of regular dark, and a row of cayenne spiced.
Then I made a little tag out of paper scraps (it says...*geek alert*... "you're spicy and sweet <3 " to match the strawberries) and I tied everything up with baker's twine.
When Darren arrived home, he opened his card and we proceeded to enjoy the strawberries alongside a cheap, half-full bottle of champagne that had been sitting in the frig (yet was still as carbonated and delicious as the day we opened it). Classy, right?
Between the cheesy displays of affection via post it notes, a somewhat expired Groupon gift, and a half bottle of cheap champagne, you probably think we have a dysfunctional relationship. To tell you the truth, it was totally 'us' and I wouldn't have had it any other way.
PS: The strawberries came out great! I loved the salty sweet ones. The spicy ones actually weren't really spicy - you could tell there was a hidden flavor, but the heat didn't really come through. It could just be that we have a good tolerance for spicy food. I might consider adding more cayenne next time, unless I'm feeding them to spice-intolerant friends or family, of course.