25
DIY Typography Art
Happy Wednesday! If you remember from Monday, among the pumpkin carving shenanigans in my Halloween post, I let you all in on a little preview of my latest DIY project. In case you missed it, I made a personalized, typographic art print for Darren's niece/my goddaughter, Olivia, who was celebrating her first birthday this past weekend. Her mom had made a specific gift request, but since I like to give homemade gifts, I thought I would supplement the requested gift with something else. Of course, I turned to my favorite inspiration-inducing culprit, Pintrest, to get some ideas. If you're a frequent reader of this blog (do any actually exist?), you might remember this Pottery Barn 'pinspired' home decor project awhile back. We interrupt this program for a brief announcement.
If you haven't yet discovered Pintrest, you don't know what you're missing. It's like the preferred drug of eye-candy oglers and bookmarking fanatics. I'm addicted, on it until the wee hours, and it makes me feel warm and fuzzy inside...only instead of just saying no, I say heck yes every time. And it's legal.
There. I'm done. Sorry for the bordering-on-creepy analogy. Back to business.
There were tons of adorable (and DIY-able) baby items and projects I was finding, but for some reason, the personalized art was really striking a chord with me. I think what I liked most about the art was that many of the prints could be appreciated by Olivia for years to come, versus clothes and accessories, which she would quickly outgrow. These were a couple of my favorite finds.


And...woop there it is was. My inspiration (or perhaps 'pinspiration,' thanks to Pintrest's influence). I could do my own take on Indiana's print, personalizing the 'O' with Olivia's name repeated in different fonts and sizes like the 'E' print above. Since I didn't have a plain template to work from, knew I would likely need to make a lot of text boxes, and assumed I would want to have a lot of control over placement, color etc., I knew Microsoft Publisher wasn't going to cut it. However, I don't have Photoshop or Illustrator (I'm too poor to invest the money into buying those programs considering the little bit of design stuff I like to pretend I can do), so I jumped into my ghetto fabulous free version of Gimp, a Photoshop program wannabe.


If you haven't yet discovered Pintrest, you don't know what you're missing. It's like the preferred drug of eye-candy oglers and bookmarking fanatics. I'm addicted, on it until the wee hours, and it makes me feel warm and fuzzy inside...only instead of just saying no, I say heck yes every time. And it's legal.
There. I'm done. Sorry for the bordering-on-creepy analogy. Back to business.
There were tons of adorable (and DIY-able) baby items and projects I was finding, but for some reason, the personalized art was really striking a chord with me. I think what I liked most about the art was that many of the prints could be appreciated by Olivia for years to come, versus clothes and accessories, which she would quickly outgrow. These were a couple of my favorite finds.
I loved how the first print colorfully emphasizes "I love you" within the alphabet, while the second was more personalized with a name and initial. Apart from all other practical and baby-gift-related reasons, I think that typography is pretty much the bees knees (does anyone even use that phrase anymore?). Plus it seemed like something my graphic-arts-rookie self could tackle. Double win. For some reason, seeing the "I love you" print reminded me of Robert Indiana's iconic LOVE screen print.
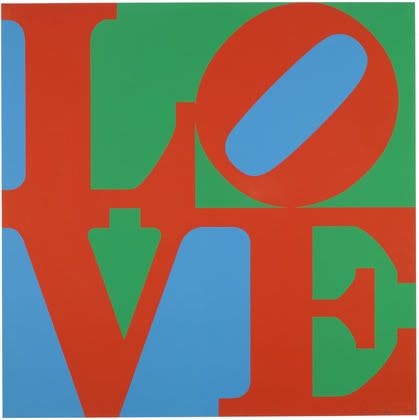 |
| Photo courtesy of www.moma.org |
From there, I opened a blank 8.5"x11" 'image,' found a serif font that looked like the one in Indiana's print, and created a separate text box for each giant letter. I rotated the 'O' and changed the font color to a shade of grey so that I could use it as an outline over which to place the text boxes.
Next mission: create many, many text boxes. I wanted one of Olivia's names to stand out more than the others, so I made that as the first layer in a nice scripted font. Then, like a mad woman, I continued creating 'Olivia' text box layers in all sizes and fonts. Some were all lower case, some all upper case, and some in the traditional proper noun way, but I tried to vary them to keep it interesting. It really started filling in, as you can see in the up-close-and-personal screen shot below.
Some of the small spaces were getting hard to fill in, but I tried not to let them bother me too much. In fact, I saved a number of them for last, since it was hard to find fonts that I could make small enough to fit, but would still be legible. Once everything was filled in, I removed the original 'O.'
I was so excited about how it turned out that I got off the couch and did an Ellen-esque dance. Only substitute the cheering audience and President Obama with an unfazed Darren at the other end of the couch (my spontaneous bursts of dancing no longer surprise him).
Somewhere between finishing the 'O' and busting a move in my living room, I came to the realization that I could do the same design with the 'V,' which couldn't be more perfect since Olivia's last name is Vaughan. (The excitement probably only enhanced my dance moves.) So I immediately got to work on it in the same way I started the 'O' - by greying out the letter 'V', creating a large focal point word in the same font as the one in the 'O,' and throwing in text box layers. It was starting to look like The Sorcerer's Apprentice up in this place, only with multiplying text layers instead of brooms.
The skinny, right side of the 'V' was a bit challenging because the fonts had to be so small to fit. I didn't want them all the same size, so I made some of the words vertical or broken into two lines.
When all was said and done, I removed the original, grey 'V.'
I was really happy with how it came out, but it needed some color. Her room has light blue and light green paint colors, so I considered coordinating the print. However, I also thought about using colors that would be more timeless (less pastel/baby-ish) in hopes that Olivia would still enjoy her art as she grows older and into more mature room decor.
Ultimately, I decided that the green and blue looked too washed out. The black and rose were a bit more sophisticated, plus the pink color of the focal words drew attention to her full name within the initials.
A smidge of color and 230 text layers later, I was done. Since Olivia's room doesn't currently have anything on the walls except a tree and Winnie the Pooh mural in the far corner (I knew this from little a reconnaissance mission I did last time I was at their house), I wanted to make sure the print was a fairly large size. I found a 12" square frame with an 8" mat, which I thought would be the perfect size - big enough to read the print and square to fit the shape of the text. Plus it was on sale for 50% off at Michael's. Boo-yah. I had some leftover 110lb card stock leftover from doing the programs for Rachel's wedding, so I took some of it to Office Max to have my art printed. It came out really nice (though I might try matte photo paper next time just to see what the difference is). I just barely had enough time to frame and wrap it before the party, so I didn't have time to take a picture. Jamie (Olivia's mom) had to send me one from her phone later.
It seemed that a lot of people at the party liked it, and one of my friends even suggested that I try selling other customized versions on Etsy. What do you guys think? Would you be interested in something like this, either with a child's first and last name or a whole family's first names and last name? Now that I have a 'template,' I wonder how long it would take me to make a new version. Regardless, I hope it has inspired you to try your own typography art. It really was quite simple...just time consuming!...but with a fun result.
Since Pintrest was a big part of my inspiration for this project, I've decided to link this post up as part of the fall Pintrest Challege, hosted by the lovely and always inspiring ladies at Young House Love, Bower Power, Ana White and House of Earnest. (I participated in their summer challenge here.) I could only dream of aspiring to their level of blogging greatness and general DIY coolness.
As well as a couple of other link 'parties':
As always, I would love to hear your feedback! Do you have any cool typography prints in your house? Do you think this project has Etsy potential?

