0

Making Good Use of the Garden

Posted by Corrie on 2:10 PM in ,
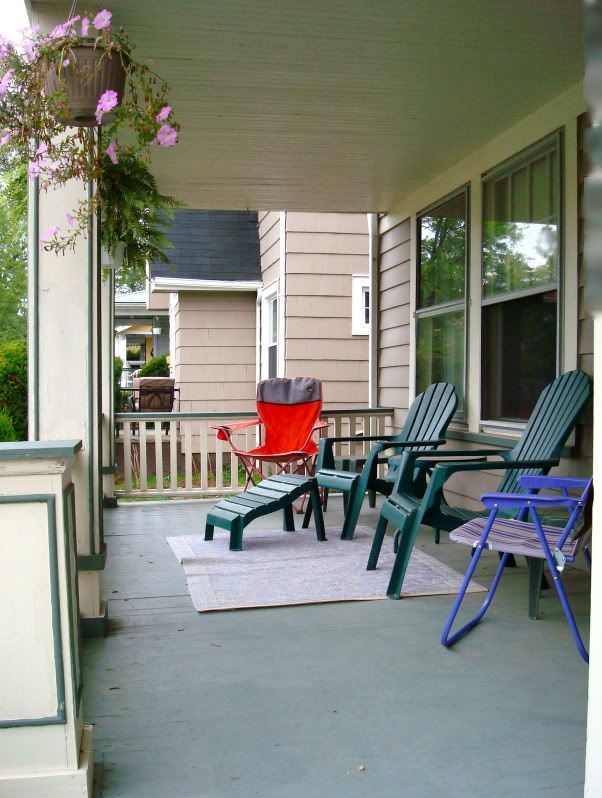
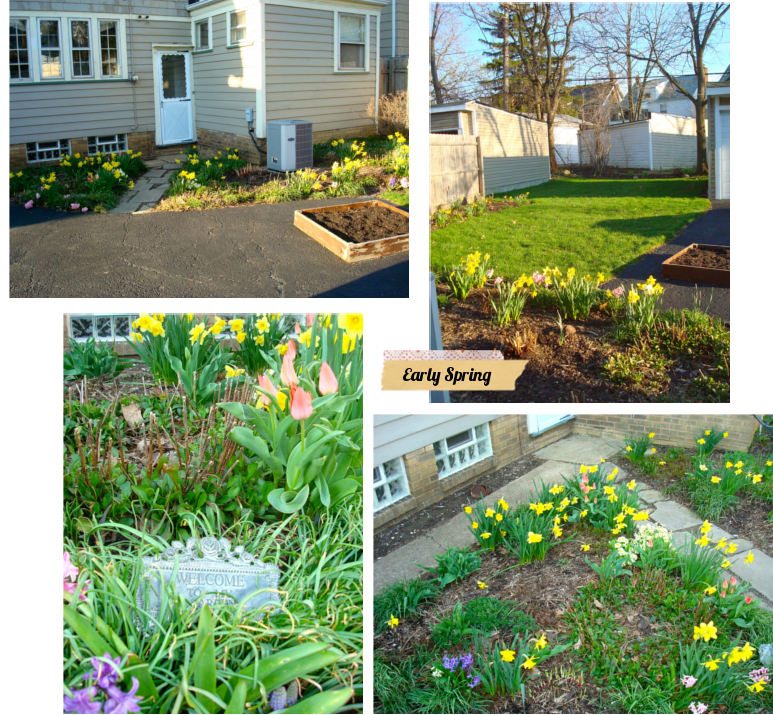
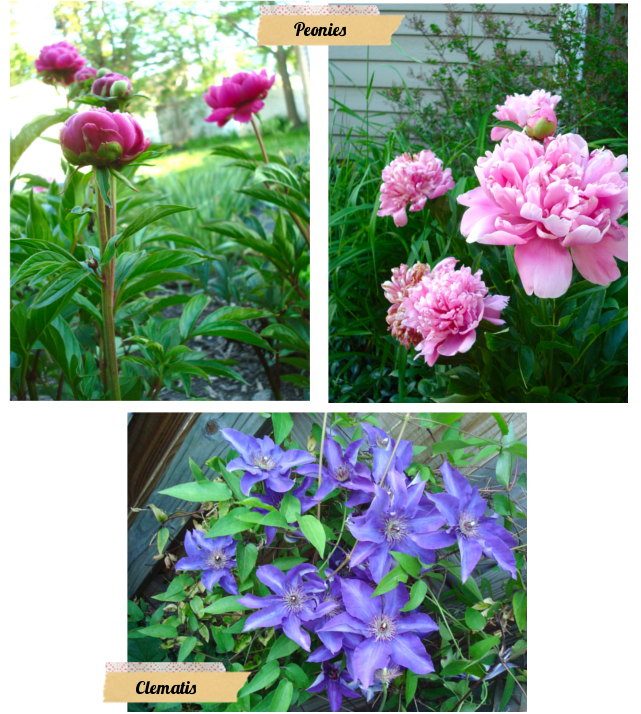
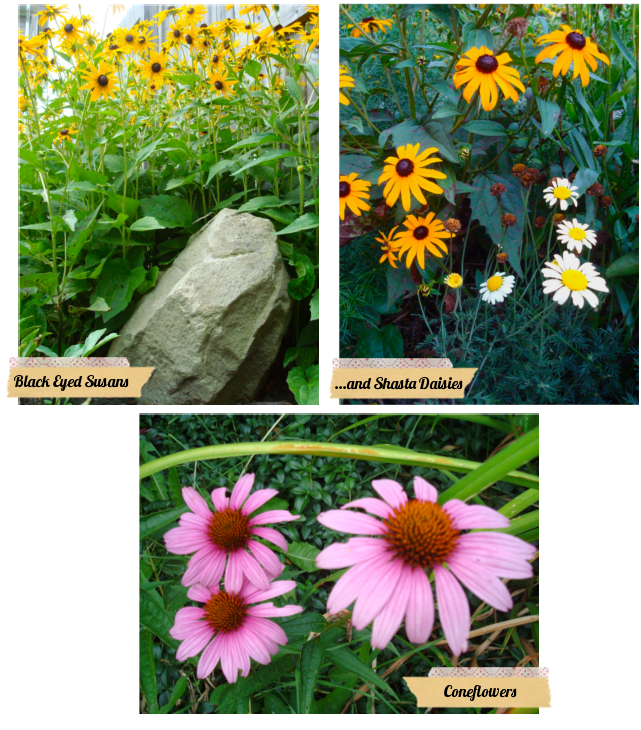
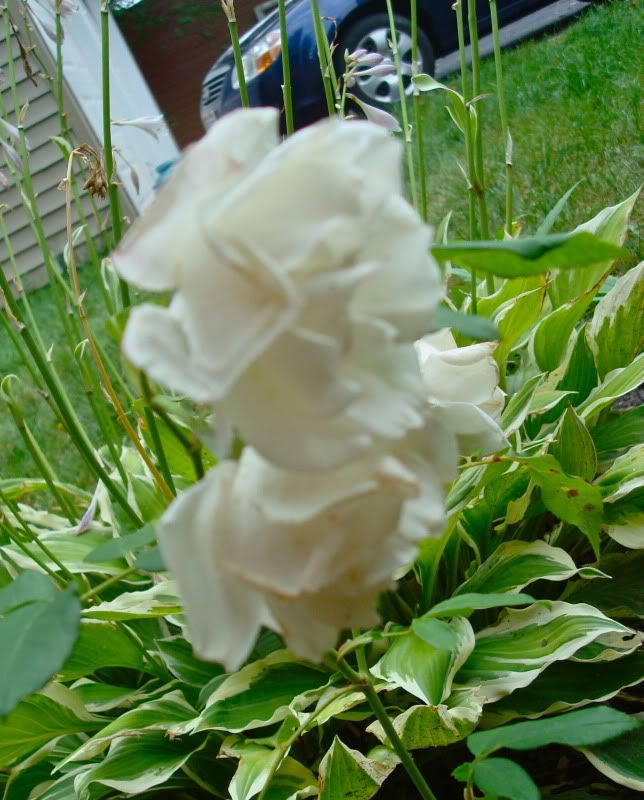
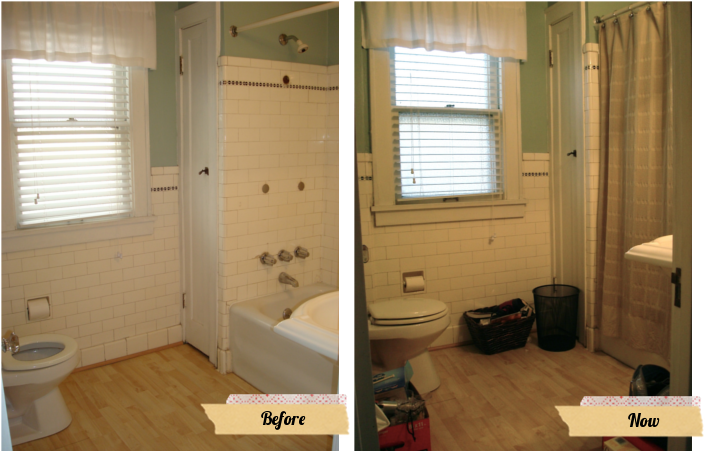
Last night I shared the outside tour of our house, which included a glimpse into our ever-changing gardens. Almost all the updated pictures I posted were of the flowers that have popped up - but that's not the only stuff that's growing out there. While some people grow food in their gardens, I grow 'drink accessories.' Just kidding. By drink accessories, I meant herbs, but I grow veggies too.  My next post will be about this year's seed starting adventures - my first time trying it! - but I thought I would take a little break from the garden mumbo jumbo and share something you can use, regardless of whether you have a garden. 


My overly ambitious, type-A self was hoping to plant a window box full of herbs this spring, but due to all the rainy weather, I only got around to planting basil in the square foot box and two kinds of mint in some containers. These were priority herbs for me because we like to make margherita pizzas from scratch (fresh basil goes on top after the bake), and I often drink mint tea before bed or as a way to settle my stomach if I feel sick or eat too much. Instead of buying prepackaged mint tea, I thought I would do a little 'experi-mint' (yay for bad puns) and try making my own. I started the basil from seed, and planted three containers of mint - one container each of peppermint and spearmint with seeds and two small plants in each (as a backup if the seeds failed), and one container of spearmint completely from seed. This is how the mint started out:


And this is what it looks like now:


Wowzers does that stuff grow fast! (Tip: If you attempt to plant mint in a garden bed instead of its own container, it's advisable to plant it in a bottomless coffee can or other small container, and then bury the whole thing in your garden. Mint spreads out quickly - and I hear is hard to remove - so this planting method will help contain it.)  It was even more lush looking before our heat wave last week. Plus I've experimented with some tea already which has made it a little more sparse. Anyway, I've rambled on about gardeny stuff and still haven't gotten to the fun part you can use: a mojito recipe! (Was my 'drink accessories' comment from above a good hint?) We had some friends visiting from Columbus this past weekend and it occurred to me that growing your mint has yet another fantastic advantage. Mojitos. And so ladies and gents, I bring to you my fabulous Garden Mint Mojito recipe, in both pitcher and single glass form, as adapted from a variety of recipes I found on the internet. (The pitcher version was Columbus guest tested and approved this weekend, and the single glass version tested and approved by me after my 27 mile bike ride on Monday night.)


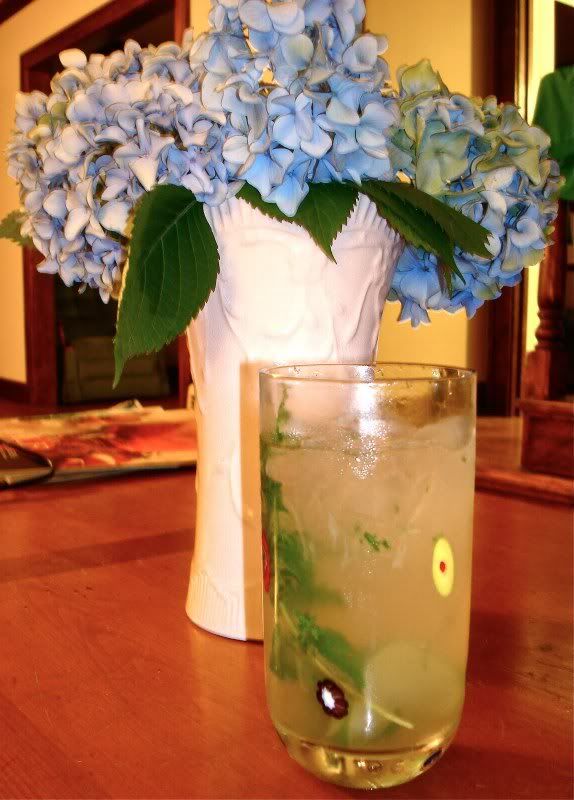
First a few things to note. The key to a mojito is freshness. Fresh lime juice + fresh mint = fresh tasting drink. It's a little labor intensive, which is why I recommend the pitcher version. Although I grow both spearmint and peppermint in my garden, spearmint imparts the more desirable flavor for this drink. If you are buying your fresh mint from the grocery store, it is likely spearmint, so you shouldn't have to worry about getting the wrong kind. I choose to use entire sprigs - stem and all - when I muddle, because much of the minty oils come from the stem and I think it helps create less 'debris' in the drink than using loose leaves. Don't over-muddle. Your mint should not end up in itty bitty shredded pieces. I know the amount of sugar looks like a lot, but it is necessary. Sugar helps cut through the acid of the limes and enhances the flavor of the mint, so you will want to go with the recommended amounts. Lastly, you might want to consider using simple syrup in place of the sugar because it dissolves instantly. I didn't this time because we made them spur-of-the-moment, but I will likely try it next time. Sip slowly and enjoy the way the flavors meld as you drink. On to the recipe...

Garden Mint Mojitos

For a pitcher: 
Juice of 8-10 limes (depending upon how large they are)
5 springs of mint, intact (about 10 leaves per sprig)
Scant 3/4 cup of granulated sugar (or about 1/2 cup simple syrup - see below)
1-1.5 cups of white rum (depending upon how rough of a week it's been) - I recommend Bacardi
Chilled club soda/sparkling mineral water

Place lime juice, mint and sugar in a cocktail shaker and muddle, releasing mint oils and dissolving sugar into the juice. If the mint is floating too much in the liquid, strain some out into your pitcher and continue muddling in the shaker. (You can always muddle directly in the pitcher, but mine has an oddly shaped bottom which would've made it difficult.)  Strain all liquid and throw some of the muddled-but-still-somewhat-intact mint springs into the pitcher. If you have a clear pitcher, add a couple of the used and abused lime halves for decoration (only if you're optimistic and think the drink will last that long).  Fill glasses full of ice and pour the drink over top. Add a fresh, extra mint sprig to each glass for garnish.


For an individual drink: (Cue George Thorogood's 'I Drink Alone'...anybody? anybody?)

1 whole spring of spearmint (about 12 leaves, intact on the stem)
2 Tablespoons of granulated sugar  (depending upon how sweet you like it. Or, substitute .75oz. of simple syrup - see below.)
Juice from half a lime
2 oz. of white rum - I recommend Bacardi
3 oz. chilled club soda/sparkling mineral water
(That's 2 parts rum to 3 parts soda/sparkling water, for those who don't like to measure...which is me sometimes.)

In a tall glass, add the whole mint spring, sugar (or syrup) and lime juice. Gently muddle to extract the mint oils and dissolve much of the sugar. Just don't go too nuts on it. Add the used lime half from the juice you squeezed out and fill the glass with ice. Pour the rum and soda over the ice and stir until the glass is frosted. Garnish with another mint spring if desired. I recommend a straw if you are 'put off' by the mint bits floating around in the glass. (Sidenote: for those who don't like the muddled remnants in their glass, I think you're crazy. you can do the muddling in a cocktail shaker and then strain the resulting liquid into your glass with a little mint garnish at the end.)

Simple Syrup:
It's called 'simple syrup' for a reason. It might be the only thing simpler than boiling noodles.

2 cups (or 2 parts) granulated sugar
2 cups (or 2 parts) boiling water

Stir together until clear. Let cool and move to a bottle for easy pouring. And that's it. This stuff can be used in a number of cocktails or to sweeten non-alcoholic drinks like lemonade or iced tea - it really gets around.

Cheers! Let me know what you think if you try them! Any other fun uses you can think of for mint from the garden?

0

We're Coming Out(side) - Tour Part Deux

Posted by Corrie on 10:07 PM in
Alright, now that you've seen the inside of our house, I'll show you what we get to see out our window every day. Despite having a small yard, I have to say that I'm in love with my gardens and front porch. One of the things I was most excited about when we starting looking for houses was the prospect of actually having sunny garden space to plant veggies and flowers. Plus, after living in two rentals with covered front porches, I was hoping a covered front porch would be something I wouldn't have to live without. Fortunately, the seller of our house put a lot of time into the gardens, particularly into choosing plant varieties for blooms from spring through fall (more on the gardens later), AND our house has a nice spacious front porch! So apart from the size of the yard, I feel like we pretty much hit the outdoor jackpot.

Just like the indoor tour, I'll show some pics and list some of the projects we have in mind, crossing out the ones we've completed so far. Let's start with the front yard/porch. I forgot to take pictures of it when we first moved in, but it basically looked like a plantless, chairless version of its current self. We haven't done much with it. (I blurred out our address on the front of the house so the whole world doesn't know where we live, hence the blobby parts of the pictures.)

Front Yard/Porch:


  • Obtain clear cafe string lights for some porch ceiling ambiance
  • Decorate with potted/hanging annuals - I do have some hanging currently, but not as many as I had hoped
  • Plant some shade/part-shade friendly perennials in the front yard to cheer up all the shrubbery
  • Paint wood patio furniture and make new cushions for outdoor seating - partially done. The patio furniture has been painted (stained, actually) but I have yet to redo the cushions, which is why we haven't put it on the porch yet. 
  • Repurpose our old baker's rack as a potting stand - you can see in the lower left picture that it has found its new home - a perfect fit - in the awkward front corner of the porch. 
  • Paint plastic adirondack chairs with Krylon Fusion (plastic friendly paint), possibly light blue.
  • Replace house numbers and mailbox

Backyard:
    
      
A few things to point out...The wooden box sitting in the driveway is a 3'x3' square foot raised bed. As you can see in the lower right picture, we have two walkways from the driveway that converge at the back door. Unfortunately, they slope downward toward the house, so every time there is a heavy rain, we get about a 4" deep puddle of water under the door which causes seepage in the basement. See our project list below for what we plan to do about it.

But first, let me show you some garden updates. Though there are still a few plants I can't identify yet, here are some of the other things you'll find growing since the first pics were taken in April:

In late spring/early summer...


As we hit the hot days of Summer...


Ahhhhh summer...

Oh, right. Here's the yard projects we have in mind so far: 
  • Install a privacy fence with gate
  • Fix the pipe/drain issue outside the back door by installing a new drain and regrading the landscape - Temporarily done! I will post on our drain-scapades later.
  • DIY a cobblestone patio with partial retaining wall
  • Make earthboxes (giant self-watering planters) for balcony veggies
  • Plant the square foot garden box - Check! Next up is a garden post about what I planted.
  • Buy/make window boxes for herbs
  • Fix garage door, which sometimes doesn't close all the way
  • Replace back balcony rail to match the front porch
  • Find something to hide the air conditioner unit - tall plants or bamboo 'fencing'?

And since there are some other things we have on our list that don't really fit into a specific room/area of the house, here are some of the random projects we have in mind:
  • Enhance existing insulation - our insulation seems to be pretty good, but I'm sure there is room for improvement. We might have to determine that by having someone do an energy audit though
  • Repair upstairs windows - our windows are all original to the house except for the storm windows that were added on. Some of the weighted cords on the upstairs windows are broken, so the windows don't open as easily as they should.
  • Buy and install basement supports - One of the things our inspector noted was that there has been some structural shifting over time, which can easily be fixed/stopped by fitting some support posts and beam brackets in the basement
  • Paint the house and front porch - our seller touched up some areas, but the paint colors don't exactly match well and you can tell. Some of the paint is starting to peel and I don't really like the hunter green anyway so I'm looking forward to changing it.
  • Paint the front door - I like red front doors, but I feel like that's kind of cliche. I'm thinking something terracotta colored - it's not really red, and not really orange (which is my favorite color, but let's be honest it could be kind of questionable as an exterior house paint choice)

So there you have it! Any suggestions for some great flowering, shade-friendly perennials for the front yard and back by the garage? I would love something purple but I know I can't be too picky. Do you have any plants or flowers that have made a surprise appearance in your yard this year?

4

If You're Feeling Board

Posted by Corrie on 2:17 PM in , ,
Yes, that was a purposeful misspelling. What I REALLY meant to say was if you're feeling bored with your boards - cork boards that is - I have a fun little project to share with you. Today was Darren's twin nieces' 10th birthday (I can't believe they are already 10! I remember feeling so 'grown up' when I reached the double digits...) and they had asked for cork boards for their bedrooms. Ironically, in my recent browsing around the internet, I had come across some DIY tutorials on fabric covered cork boards, so I thought this would be a perfect opportunity to try them out. Soooo today we are taking a little reprieve from the house tour because I'm still editing photos to share with you a fun way to jazz up those old boring cork boards you have sitting around your house.

Cork boards seem to be making a comeback in home decor for both kids and adults as an obviously practical organization tool. But let's be honest. They aren't exactly attractive on their own. Though some of my favorite stores to window shop are currently selling some more stylish versions of the standard cork board, I thought I could do way better on my own in terms of price.


Clockwise: West Elm pushpin canvas board $59 (no longer available); The Container Store Linen Bulletin Board 15" $29.99;  PB Teen White Dot Post-It Pinboard 24"x36" $79 (on sale $69)


Knowing the girls wanted the kind of board you use push pins with - instead of a memo board which typically has criss-crossed ribbons that you tuck things under - I browsed around the interwebs for some different tutorials. What I ended up doing was kind of a mix of a few different methods.

First, I dragged Darren with me to Joann Fabrics since he was footing the bill to help me pick out fabrics that would be fitting for the twins rooms. Despite being twins, the girls have very different personalities and interests so I didn't want to make matching boards. They also have their own rooms - which they have recently started redecorating from what I understand - so I wanted to pick something out that still reflected their girly sides but was a little more sophisticated now that they are getting older. Although the new decor for their rooms would incorporate a number of colors, one of the girls loves pink, and the other purple.

We scanned through the sale section first and narrowed it down to two fabrics, which were each $2 off per yard.
Since each fabric was 42" or more in width, and our cork board dimensions were only 17"x24", we knew that only half a yard would be plenty of fabric. (I realized later that a quarter yard - or a 'fat quarter' in fancy sewing terms - might be enough of some people, but it would've been just barely too short to cover our boards. Fat quarters are often sold in precut bundles and are very cheap.) After grabbing our fabrics, we went off in search of paint for the frames and ribbon for the trim. Since the fabrics we chose had similar accent colors - light blue and pale green - I decided to paint both frames light blue and use pale green ribbon around the edges of the cork. This turned out to be more cost effective because I only needed to buy one small bottle of paint and one roll of ribbon to put together both boards (instead of different ribbon and paint for each one). When we got home, my set up looked something like this:


My supplies were fabric, the cork boards, paint, a dish for the paint, ribbon, a foam paintbrush, spray adhesive, Fabri-Tac (a fabric glue), scissors, a knife, a fabric cutting mat and fabric cutter. Since I was doing this on my glass top dining room table, I laid down a bunch of newspaper first so I didn't end up with a painty gluey mess all over the place. (Well, I had a painty gluey mess anyway, but at least it was on newspaper and not on my table.) I painted the frames first and didn't worry about being too careful not to get paint on the cork since it would be covered anyway. They took 3 coats of paint each since the wood frames had some sort of shiny finish on them that caused the first couple coats to look a little streaky. I might take the time to sand the frames a bit before painting next time, just to roughen them a tad and make the paint adhere better. And so far we have this:


Let's pretty it up. I laid my fabric right side down on the cork board, took a pen, and traced just barely wider than where the cork meets the frame. Very technical measuring, because I'm a very technical person, obviously. Then I use my fabric cutter and mat to cut along the lines I had traced. You could use scissors for this, but a fabric cutter is much quicker and cuts a clean straight line. At this point, I have to be honest and tell you that I got too fancy for my own good on the first board and attempted to tuck under all the edges by gluing a faux-hem with the Fabri-Tac so the fabric would have nice clean edges in hopes of perfectly aligning with the wood frame. 


Then I came to my senses, got over my type-A personality (momentarily) and realized it wouldn't create a perfectly gapless seam between the frame and fabric. I was wasting my time. No matter how hard I tried, there would always be a little sliver of cork showing through near one of the edges. So, with the fabric still turned right side down, I sprayed the entire back generously with adhesive spray then carefully align it on top of the cork. (Warning: do this away from the cork boards and anything else you don't want to end up with a sticky film all over it when you are done spraying.) Starting from the center ad working outward, I smoothed the fabric so there were no bubbles and creases. Any edges that might not have been sticking well got a little Fabri-Tac treatment to put them in their place. Since there were inevitably some places where the fabric was slightly overlapping the wood frame, I took a knife and tucked the fabric under the frame to secure it for a nice clean look, being careful not to pucker the fabric as I went along. 


The final step was to cut the ribbon to fit along the cork on the inside edge of the frame. This serves a dual purpose of looking cute and covering and messy looking spots along the edges. Tricky, huh? I cut each end of the ribbons at an angle so that they would align together in a nice neat little corner then glued it all down with Fabri-Tac.


Done and done. Two fabric covered bulletin boards completed in one evening. I even had a little extra time before bed to make big tags with the girls' names to attach to the packages as a way to spruce up my cheap-but-slightly-less-than-exciting wrapping paper.


The plaid one is for A, who is a little more sporty, and the flowery one is for S, who is a little more artsy. They were really excited when they opened their gifts at dinner last night, and the look on S's face when she said "you MADE this?!" was priceless. I hope they enjoy having something unique and functional for their rooms, and especially that they get a lot of use out of their cute little corkboards (with push pins to match). In fact, I'm thinking we could use some of these in our office...Maybe I'll make a couple 'grown up' versions for Darren and I to hang above our desks. Perhaps with burlap or linen or something...the wheels are already turning...

Oh, but wait. The final cost? Less than $30 to make BOTH of the boards, and that included an extra roll of ribbon I didn't use, as well as the Fabri-Tac which I can use for future projects. Compare that to the ones I found above and we ended up with way less expensive gifts that are personalized to each girl's tastes. Score. Personally, I think they're even cuter than the ones I found at PB Teen. But I guess I'm kind of biased because I made them. 

2

Le Grand Tour

Posted by Corrie on 1:43 PM
You asked for it. You got it. Welcome to the grand tour of our new casa.  Nothing is even remotely close to being in a finished state - few things are even in a permanent place even after living here two(!) months - so we're going to throw in some before and sort of in progress pictures. In addition, we thought it would be fun to list some of the projects we have in mind as we tour along. You know, to help you visualize what kinds of changes we have in mind. Since pictures + project lists = really long post, we'll split this up into two posts - one for inside the house, and one for outside/miscellaneous.

We are pretty fortunate in that there weren't any major changes we needed to make immediately upon moving in...you know, like really heinous brown and orange floral wallpaper or something that would make us want to tear our eyes out just looking at it everyday. Which is pretty good considering our house was built in 1926. That's right folks, our house is older than my grandma. Fortunately, our seller got rid of the scary all-over-wallpaper stuff during the 14 years she lived here - we know how bad it was because she showed us pictures of what it looked like when she moved in. (Thanks for doing the dirty work for us Bev.) Even though there wasn't anything too scary, obviously not everything fits our tastes, so there are plenty of changes we have in mind. Let's start with the inside:

Living Room:


Living Room Projects:

  • Paint walls and ceiling - I painted the walls a pale greyish-taupe before we moved in to hopefully brighten up the dark wood thing we have going on in there. I also bought some Sherwin Williams Brilliance ceiling paint during a later sale, but have yet to paint that. (I think it is fantastic that all the original woodwork is intact - and looks great - so as much as I love the look of bright white trim, I'm going to be a 'naturalist' and keep the original woodwork downstairs for now)
  • Paint heat registers so they blend in more with the dark woodwork
  • Get matching jute rugs for both seating areas - our current rugs are quite clashy, so I'm hoping for something neutral and durable that will create a cohesive look.
  • Replace loveseat with two chairs - the loveseat doesn't work functionally as its own seating space in our long narrow living room, but hey, we work with what we've got in the meantime
  • Acquire less modern looking lamps - left from our college-to-'grown up' transition and a little boring for my taste
  • Slipcover the sofa in a washable neutral color - it was a hand-me-down from Darren's oldest sister and is a little rough around the edges.
  • Make or buy light and breezy neutral curtains for the windows 
  • Create some front entry organization. There's just an awkward bare wall where Remy's toys are supposed to live right now and I feel the need to do something more practical with it.
Dining Room


Dining Room Projects:

  • Paint walls and ceiling - check! Did the walls before we moved in. Ceiling soon.
  • Change out the chandelier - I like it for now but might try to play with changing out the covers or something as a start
  • Get rid of the old blue recliner (it has a vice grip for a handle - classy.) that is randomly floating at the back of the room because we have no place for it
  • Create a wood wrap-around 'bar' for the kegerator - the white monster is a bit of an eye sore, but we can't bear to stick our beloved (DIY-ed) kegerator in the basement (not to mention it would be super inconvenient when we have parties) so we plan to class it up a bit.
  • Make new curtains - dark green is one of my least favorite colors, so I will probably go with something light and breezy to tie into the living room.
  • Get a larger more room-size appropriate rug (yellow pattern?)
  • Find different pairs of dining room chairs so they aren't matchy-matchy but still have some cohesiveness and interest
Kitchen

Kitchen Projects:
  • Replace hardware with oil rubbed bronze knobs and pulls - the current ones are a little modern for my taste and I'm hoping to go for a more rustic, country kitchen kind of look
  • Build breakfast nook benches, possibly with storage, so we can make practical use of the space (currently we just have boxes of picture frames, decor, and books sitting in there, which we have yet to unpack)
  • Build or find a breakfast nook table
  • Make roman shades for the windows - there are valances everywhere(!) and I'm not the biggest fan.
  • Make pantry shelves and paint the pantry - we need more food storage and that closet would make a perfect pantry
  • Install undercabinet lights
  • Get rid of the fan or replace it with something smaller and more appropriate for the space
  • Replace the nook light fixture. Gold = ick.
  • Replace the countertops
  • Paint all the trim - it's a little dingy looking
  • Replace the light fixture above Remy's food, which looks like it's going to fall out of the ceiling

Half Bath

Half Bath Projects:
  • Paint a seafoam blue color
  • Find or make shelves out of crates
  • Install reclaimed beadboard wainscoting (we have it sitting in the basement from a friend who tore it out of her new house)
  • Replace the laminate floor with white hexagon tile
  • Remove the current light fixture and install one or two sconce style fixtures with a switch

Stairway/Upstairs Hall - still looks exactly the same and I just plan on painting for now!


Full Bath

Full Bath Projects:

  • Paint a neutral color - maybe the grey from the living room?
  • Paint the trim and doors - they're white, but all dirty and streaky looking
  • Make a shelf with hooks for towels
  • Make shelves for the closet so we can finally put away all our stuff (yep, that's all of it still in boxes)
  • Repair and clean the white subway tile
  • Install a fan
  • Install low flow dual flush toilet adapter
  • Replace laminate flooring with white hexagon tile
  • Buy a new shower curtain since the current one is a little too vertically challenged like me short

Master Bedroom:

Master Bedroom Projects:

  • Paint a dark bluish/grey color - You can see the paint swatches on the wall. I like to sleep in places that are dark and cave-like. (Is that weird? Like something Batman would do? I guess I just never understood having a bright bedroom when the whole purpose is sleeping.)
  • Install bamboo shades in place of the white ones
  • Replace current quilt with white pickstitch quilt to contrast with the future dark walls
  • Possibly make/buy a bed skirt so you don't have to see the ugly metal bed frame
  • Make a few pillows for interest
  • Replace my dresser with a vanity style dresser I can sit at to do makeup
  • Buy/make a shoe rack for the closet
  • Acquire under bed storage for my out of season clothes

Office
Office Projects:
  • Paint - possibly orange? I'm feeling like something bright (since this will also be my 'craft room') to get the creative juices flowing.
  • Get better craft organization so Darren will let me make the Office an Office/Craft Room
  • Purchase a desk lamp
  • Buy a desk for me to use - Done! Scored one for $50 from a sorority sister who moved out of state and couldn't take it. Best part is that the desk was exactly what I had been looking for for months.
  • Replace curtains with something bright - maybe a breezy yellow print?

Guest Bedroom

Guest Bedroom Projects:
  • Paint - same seafoam color as the half bath? the current mint green color kills me.
  • Find a new bedspread - maybe ticking stripe? The old one I used was from college and has a rip in it and a big stain on the underside.
  • Buy better pillows and throw pillows - we want our guest to be comfy!
So, that's pretty much it for the inside! I apologize for the bad pictures. We just have a basic point and shoot camera that won't allow me to adjust settings manually, so some of the pictures distort colors a bit.

In addition to what you saw, we have a basement and an attic as well, which I chose not to take pictures of because there really isn't anything to see. The basement is pretty much what you would expect from an 80-something year old house and is too damp to consider finishing. The attic is actually split into two separate rooms and we just use it all for storage. We think someone might have used it as an extra bedroom at one point - though we don't know how because it isn't very temperature controlled. It does have a vent and an old cable line up there, but for now, we don't really have any desire to convert it into an extra room.

Stay tuned for the much shorter back and front yard tour along with other outdoor and miscellaneous projects we have planned. What do you think so far? How about an orange office and dark bluish-grey bedroom? I know it's not everyone's cup of tea...

Copyright © 2009 House Made All rights reserved. Theme by Laptop Geek. | Bloggerized by FalconHive.