2
Halloween Decorations & Printables
It's fall ya'll! And boy has October come in with a bang. Here in Cleveland it was a rainy, windy, miserably cold weekend. Who am I kidding...that pretty much sums up the past two weeks. Regardless, I used this gross-weather-weekend as a good opportunity to put in some overtime at work, cook up some potato leek soup, and then bust out the Halloween decorations! The start of October officially means Halloween in my book, and as one of my favorite holidays - a close second only to Christmas - I wanted to get the decorations up asap. (Darren has been asking "When are you going to put up the fall decorations?" for about 2 weeks now, so I guess 'asap' might not be the right description...) Plus, I saw that one of my favorite blogs, The Lettered Cottage, was hosting a fall link party, so I thought it would be fun to participate. You know how I need extra motivation sometimes. (If you want to see what a REAL blog looks like, check out Layla and Kevin over on The Lettered Cottage. Not only do awesome house projects, but they have some mad photography skills. Their talent puts me to shame.)

Anyway, I got D to bring down my one andlonely only box of halloween decorations from the attic. Some people like cute little pumpkins and scarecrows as decorations around Halloween time, which can be fun and kid-friendly. But Darren and I? No sir. Our objective is to scare the crap out of kids. We hope to one day win the Lifetime Achievement Award for Halloween Scariness (if one ever existed) by gradually turning our place into the creepiest haunted house on this side of the Cuyahoga. I emphasize gradually because, honestly, do you know how easy it is to blow all of your money on Halloween decorations? That ish is expensive. Which is why we try to buy decorations AFTER Halloween when it all goes on clearance. But what fun is buying decorations after Halloween when you're soooo excited to decorate now? It's not. Which is why I try to find DIY projects and other things around the house that I can use to make me feel like I have something new to put up. Such is the life of cheap frugal new homeowners.
After I pulled everything out of the box, I realized I only had enough decorations to really do the mantel and the dining room table. Kind of lame, but I'll take it for now. I started with 5 kraft paper skulls, which I coffee stained last fall to make them look old and textured; a creepy, furry rat; a bust statue of a vampire we picked up on clearance a few years ago; some candles; and a spider I also made last fall by painting styrofoam balls and attaching black wire for legs.
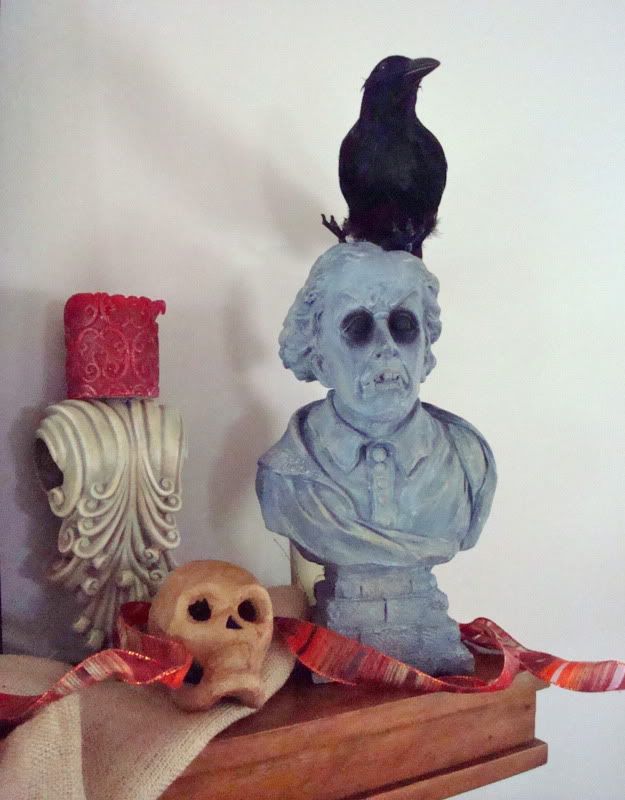

When we were up in the attic looking for the Halloween box, I spotted some grey corbels my mom gave me awhile ago for a future unknown project and thought they might work as candle 'holders.' I threw them up on either side of the mirror and scattered some plain candles I already had.
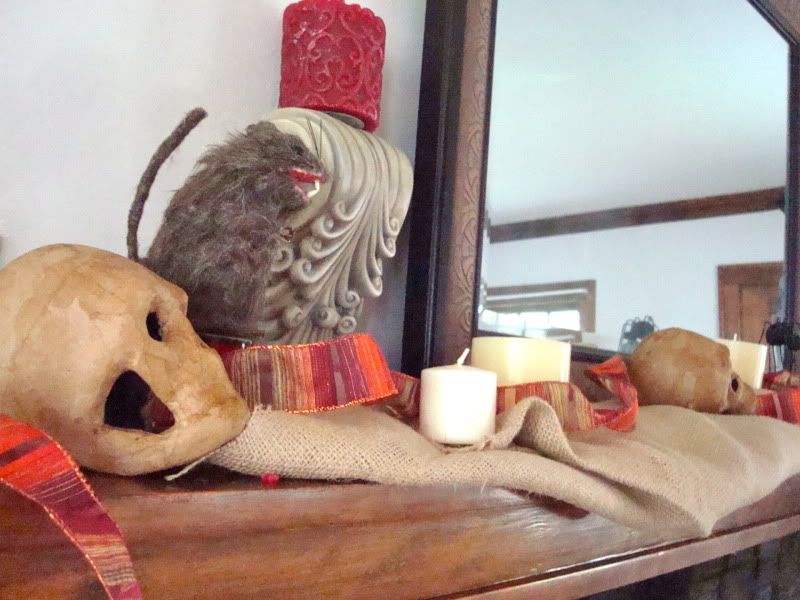
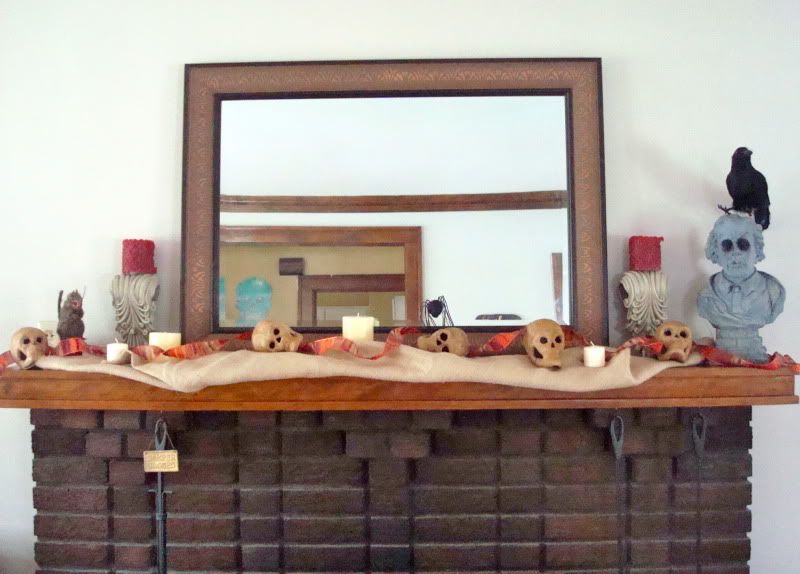
Since everything was kind of small-scale and spaced out across the mantel, it looked pretty empty. On an experimental whim, I grabbed a yard of burlap and a roll of fall colored ribbon I've had sitting among my craft stuff for close to a year. The burlap acted as a nice base to anchor all the small items, and the ribbon created a nice colorful 'flow' between all of the objects.
Ahh. Better. It sort of came together in a forced and collected-from-all-over-the-house kind of way. You could call it something from nothing I guess.
Despite my best efforts to arrange things at different heights, the mirror still looked really plain. It is pretty huge, after all. (That's what she said.) I decided to make some sort of banner to drape over it to break up the space a bit. Since Iwas in my pajamas didn't feel like running to the store, I looked around the internet and my house for some more supplies to throw something together. I figured twine would be a nice rustic replacement for string and found this guy from Women's Day via a Google image search:

I liked that they used newspaper as the background and decided to do something similar, but with newspaper as the foreground and triangle letters instead, a la the bunting on this wreath over at Pretty Ditty:

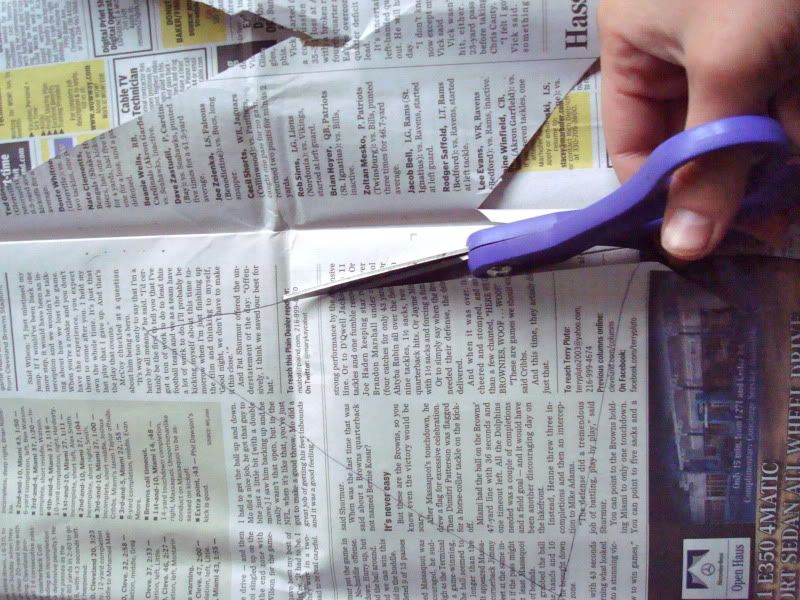
She had a printable PDF, but since our printer is out of ink, that wasn't going to work. Newspaper is pretty thin, so I figured I would pull up a cool font on my computer and trace over it on the newspaper. Kind of like a shoddy light box of sorts. First, I wanted to figure out how wide to make the triangles so I could adjust the font size on my computer to match. To come up with the triangle size, I determined the length of twine I wanted by draping it over the mirror and cutting it - 40 inches. Since I wanted my banner to spell "beware," which is 6 letters, I decided that 5 inches wide would be enough for each letter to take up space. This allowed for extra width to account for black paper backing behind the newspaper, but not wide enough to look crowded hanging from the twine. This is all very technical, can you tell? I pretty much eyeballed it. I wanted my triangles longer than wide, so I randomly chose 7 inches as the length of each side. Then, I made a template on some white paper (click here for a PDF version) and traced six triangles on non-color, print only sections of the newspaper.
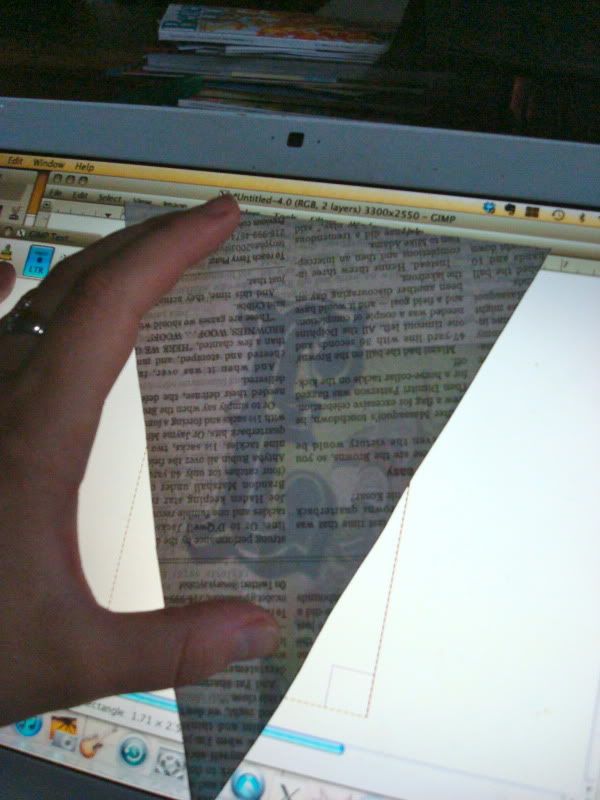
After cutting out the triangles, I found a font I liked on my computer - QuentinCaps - and enlarged it. Holding a triangle up to the screen, I enlarged the font to a size I liked. My 'light box' idea worked really well and I could see the letter perfectly through the newspaper. Using a pencil, I traced over one letter per triangle, shading in the dark areas. I just carefully held the newspaper against the screen instead of taping it, because I was worried about the tape ruining my screen (and not tearing the newspaper upon removal).
Then I colored the letters in with a black sharpie.
When all was said and done, I had these:

All that was left to do was glue them to some black scrapbook paper, cut them out leaving about 1/4" border (eyeballing it of course), poke two holes in the top of each triangle and string the twine through. Clearly it would've been much quicker to just print the letters onto the newspaper, but I made do with what I had.

Pardon the glare in the first pic and the terrible quality of the second. I took the pictures at night and we have terrible lighting in our living room.
One other quick project I did was to make these mice silhouettes from Martha Stewart to put on our stairs and baseboard (picture courtesy of Martha...my mice aren't up yet).

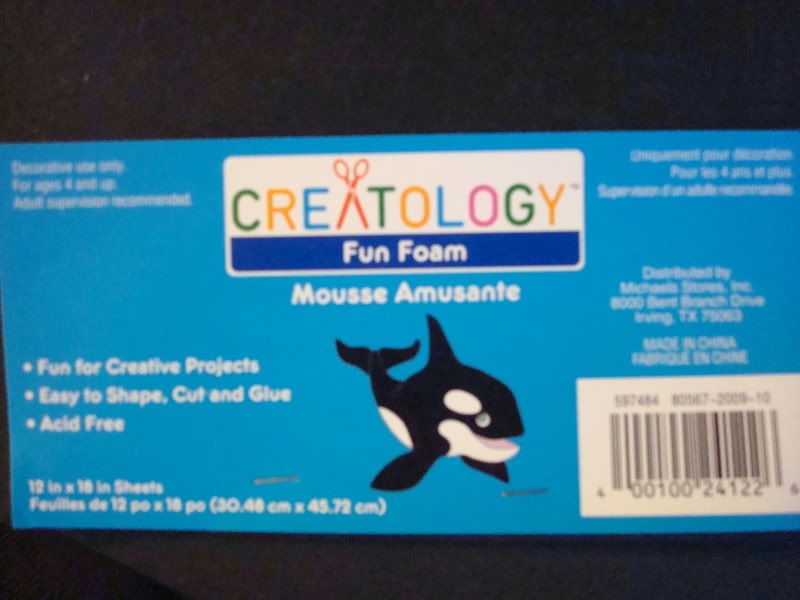
She made hers out of paper, but if I was going to spend all sorts of time cutting out mice, you can bet your cajones I didn't want something flimsy that would be destroyed in a few weeks, only for me to make them all over again next year. So, I made mine from black craft foam that I had bought last fall. The stuff is super cheap and way more durable than paper.
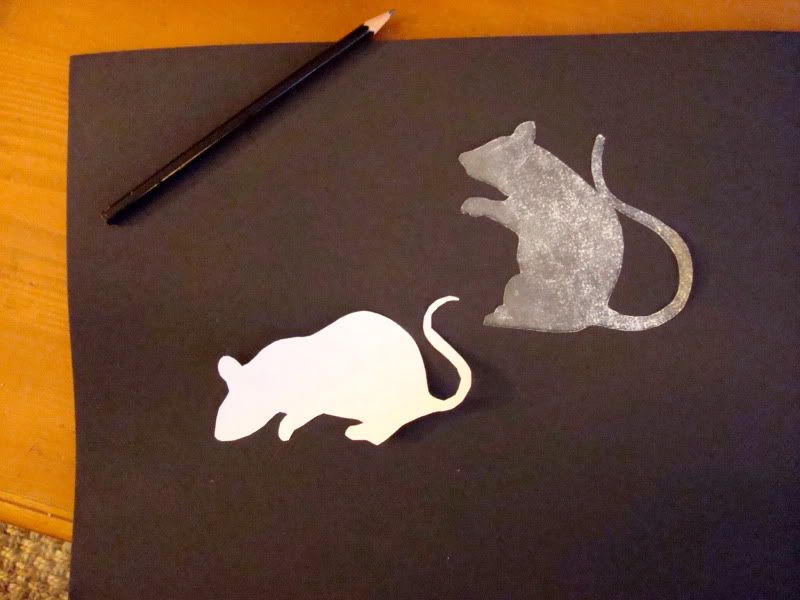
I printed out the mice templates (which you can get here) and traced them with pen onto the foam.
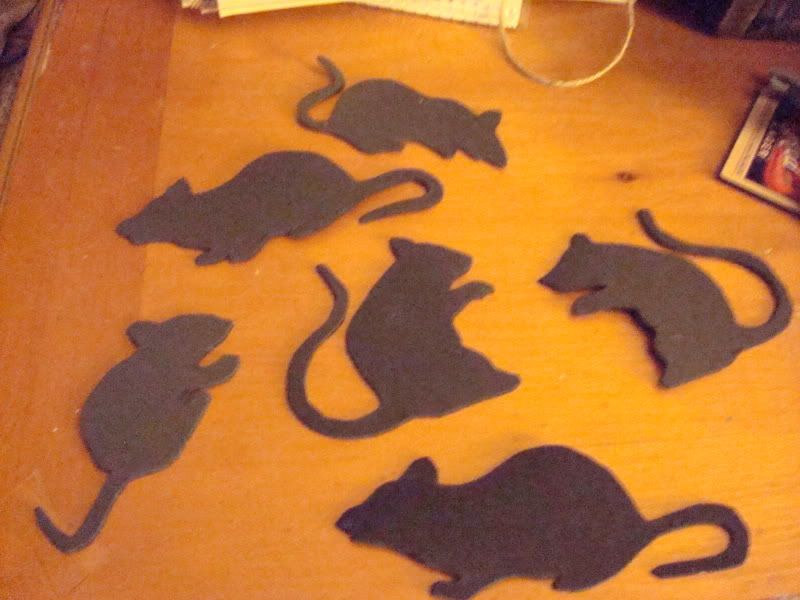
Cue some crazy cutting skills while watching TV and I ended up with these guys.
A PDF version of my 'Beware' banner

Anyway, I got D to bring down my one and
After I pulled everything out of the box, I realized I only had enough decorations to really do the mantel and the dining room table. Kind of lame, but I'll take it for now. I started with 5 kraft paper skulls, which I coffee stained last fall to make them look old and textured; a creepy, furry rat; a bust statue of a vampire we picked up on clearance a few years ago; some candles; and a spider I also made last fall by painting styrofoam balls and attaching black wire for legs.

When we were up in the attic looking for the Halloween box, I spotted some grey corbels my mom gave me awhile ago for a future unknown project and thought they might work as candle 'holders.' I threw them up on either side of the mirror and scattered some plain candles I already had.
Since everything was kind of small-scale and spaced out across the mantel, it looked pretty empty. On an experimental whim, I grabbed a yard of burlap and a roll of fall colored ribbon I've had sitting among my craft stuff for close to a year. The burlap acted as a nice base to anchor all the small items, and the ribbon created a nice colorful 'flow' between all of the objects.
Ahh. Better. It sort of came together in a forced and collected-from-all-over-the-house kind of way. You could call it something from nothing I guess.
Despite my best efforts to arrange things at different heights, the mirror still looked really plain. It is pretty huge, after all. (That's what she said.) I decided to make some sort of banner to drape over it to break up the space a bit. Since I

I liked that they used newspaper as the background and decided to do something similar, but with newspaper as the foreground and triangle letters instead, a la the bunting on this wreath over at Pretty Ditty:

She had a printable PDF, but since our printer is out of ink, that wasn't going to work. Newspaper is pretty thin, so I figured I would pull up a cool font on my computer and trace over it on the newspaper. Kind of like a shoddy light box of sorts. First, I wanted to figure out how wide to make the triangles so I could adjust the font size on my computer to match. To come up with the triangle size, I determined the length of twine I wanted by draping it over the mirror and cutting it - 40 inches. Since I wanted my banner to spell "beware," which is 6 letters, I decided that 5 inches wide would be enough for each letter to take up space. This allowed for extra width to account for black paper backing behind the newspaper, but not wide enough to look crowded hanging from the twine. This is all very technical, can you tell? I pretty much eyeballed it. I wanted my triangles longer than wide, so I randomly chose 7 inches as the length of each side. Then, I made a template on some white paper (click here for a PDF version) and traced six triangles on non-color, print only sections of the newspaper.
After cutting out the triangles, I found a font I liked on my computer - QuentinCaps - and enlarged it. Holding a triangle up to the screen, I enlarged the font to a size I liked. My 'light box' idea worked really well and I could see the letter perfectly through the newspaper. Using a pencil, I traced over one letter per triangle, shading in the dark areas. I just carefully held the newspaper against the screen instead of taping it, because I was worried about the tape ruining my screen (and not tearing the newspaper upon removal).
Then I colored the letters in with a black sharpie.
When all was said and done, I had these:
All that was left to do was glue them to some black scrapbook paper, cut them out leaving about 1/4" border (eyeballing it of course), poke two holes in the top of each triangle and string the twine through. Clearly it would've been much quicker to just print the letters onto the newspaper, but I made do with what I had.
Ahh, much better. It makes good use use of the empty space, and it adds a nice spooky touch to the decorations....And it was free. I love free. And here's the whole shebang:
Pardon the glare in the first pic and the terrible quality of the second. I took the pictures at night and we have terrible lighting in our living room.
One other quick project I did was to make these mice silhouettes from Martha Stewart to put on our stairs and baseboard (picture courtesy of Martha...my mice aren't up yet).

She made hers out of paper, but if I was going to spend all sorts of time cutting out mice, you can bet your cajones I didn't want something flimsy that would be destroyed in a few weeks, only for me to make them all over again next year. So, I made mine from black craft foam that I had bought last fall. The stuff is super cheap and way more durable than paper.
I printed out the mice templates (which you can get here) and traced them with pen onto the foam.
Cue some crazy cutting skills while watching TV and I ended up with these guys.
Plus a whole bunch more, some of which I still need to cut out.
So, that sums up some of our Halloween stuff this year for a total cost of maybe $2 worth of black craft foam (which I already had, so technically it was free.) Plus, reusing the newspaper also made my project kind of 'green,' which always gives us the warm-and-fuzzies. Hopefully this has inspired you to look through your house for some things you could repurpose as decorations (extra fabric perhaps?), and if anything, at least you can use the free printables if you're feeling a little artsy fartsy. Here are the links to them again:
A PDF version of my 'Beware' banner
Martha Stewart's silhouette mice
Pretty Ditty's Halloween bunting
Are there any fun Halloween projects you're making this year? Maybe a costume or some creepy decorations? Or maybe you're more into the fall harvest stuff, which is nice because it lasts through Thanksgiving. Let's hear all about it!
Happy Haunting!

