3
Something A-Brew
Something's been a-brew around here for the past two weeks, and if you know us well, you probably guessed BEER. And if you did, you would be right. We finally got our sh*t together to make our first brew in the new house. By 'get our sh*t together,' I actually mean that we promised to bring 5 gallons of beer to a relative's Oktoberfest party the first weekend of October, so we were already way past the date in which we should've started the brewing process. Nothing like a little lot of procrastination and a looming deadline to light a fire under our butts (slash the brew kettle). Or maybe it was the visions we had of 40 something people mobbing us for showing up empty handed...either way.
Apart from this being our first brewing session in the new house, it was also a special occasion because we had the lovely opportunity to host some company. Introducing...House Made brew. Guest starring Molly (my cousin) and Tom (her boyfriend).

I should preface this by telling you that Darren already posted about our brewing session over on his totally awesome blog, Ohio Brews, but his rundown is geared a bit more toward the craft brewing community (aka those who know a lot about home brewing), so I'm here to give you a dumbed down version. Not saying you're dumb, but perhaps less 'brew-savvy.' We thought about doing a joint post, but in the end decided it would be easier to separate them since our blogs have different audiences.
So, how does the magic happen? Well, you need some basic equipment to get started.
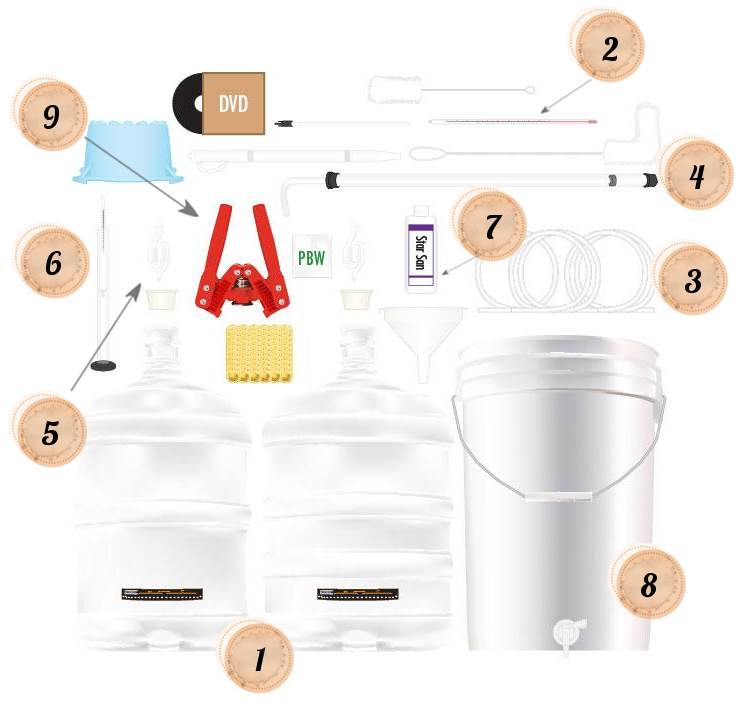 A giant stock pot slash brew kettle (about 5 gallons) to boil in, a bucket with lid and/or a carboy (1) (each should hold at least 5-6 gallons) for fermenting, a thermometer (2) that can withstand prolonged high heat, kitchen timer, a siphoning tube (3), racking cane (4), an airlock (5), a hydrometer (6), and sanitizing powder/solution (7). You could buy them separately or get a kit, which will have most of those items, like the one in the picture above, courtesy of Northern Brewer. Most beginners bottle their beer, which would require bottles (you can recycle old ones as long as they aren't screw-tops), a bottling bucket with spigot (8), caps, and a capper (9). However, we have a kegging setup, so our equipment is quite different - we'll get into that in another post.
Without getting into much detail, there are three ways to home brew: extract (most basic, typically using no to little actual grain, and is typically what a beer kit involves), partial-mash (using some extract + some grain), all-grain (most advanced, the name says it all). Extract-only brewing gives you the least control over the recipe, being more of a dump-and-stir method, while all-grain gives you the highest level of control over every aspect of the process. The first recipe we ever made was an extract + speciality grain recipe that we wrote ourselves - pretty ballsy of us, looking back - but we quickly jumped into partial mashing after that. Our recipes follow the partial mashing method because we don't have the equipment to do all-grain brewing yet, but it still gives us a decent amount of control and creativity over the end result. To write a recipe, we decide what style beer we want to make, research recipes that follow that style, pick out the desired characteristics we're looking for, then write up our own version with the guidance of a great gadget called BeerTools. Beer Tools let's us input all our info and shows us whether we are staying within the style guidelines. Added bonus - it let's us save our recipes too. There's only one recipe we've made that wasn't a Corrie/Darren Original, and we've been lucky enough that all but one of our own recipes have lived up to our expectations. Even the so-called 'failure' brew still had some big fans at our holiday party, so it wasn't completely unsuccessful.
Beers fall under two categories - either ale or lager. Ales are have their own yeast strains that ferment at warmer temperatures, while lagers have specific yeast strains that ferment at much colder temperatures. A commercial example of an ale is Guinness, while a commercial example of a lager is MGD or Budweiser, to give you an idea. But maybe you already knew that. I should give you more credit. Obviously there are many different styles of beer that fall under each category. The one we brewed this time is a Märzen, better known as an Oktoberfest style beer. This beer falls under the lager category and gets it's name because, historically, it was brewed in March (Märzen) and kept in cold storage (a cellar) until late summer/Oktoberfest. Fun fact of the day. Oh, and we named it "Dan-The-Man Marzen" after my cousin who's hosting the Oktoberfest party. It was a big hit last year, so by request, we're bringing it back for round numero dos.
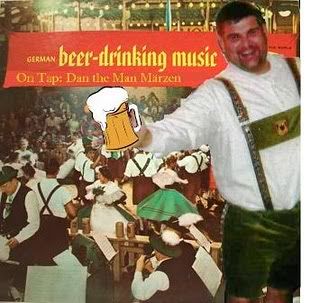
That's the 'label' we made for the outside of the keg last year. Our first ridiculous attempt at using Gimp (aka free 'photoshop') by compiling a picture of Dan, a cheesy clip art, and scanning an image of a record we own (yes, the music is hilariously awesome in case you were wondering).
Let's begin with the basics. The grain for the partial-mash, which we had already measured out and crushed into a reusable mesh sack; lager yeast; andsour cream malt extract.
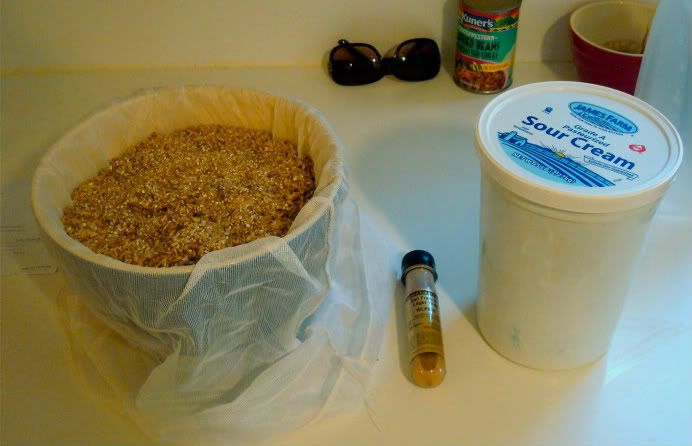
We buy our ingredients from a local restaurant that has a brew-on-premisis facility, so we reuse one of their leftover containers to hold our malt extract. So if you were genuinely concerned that we put sour cream in our beer, fear not.
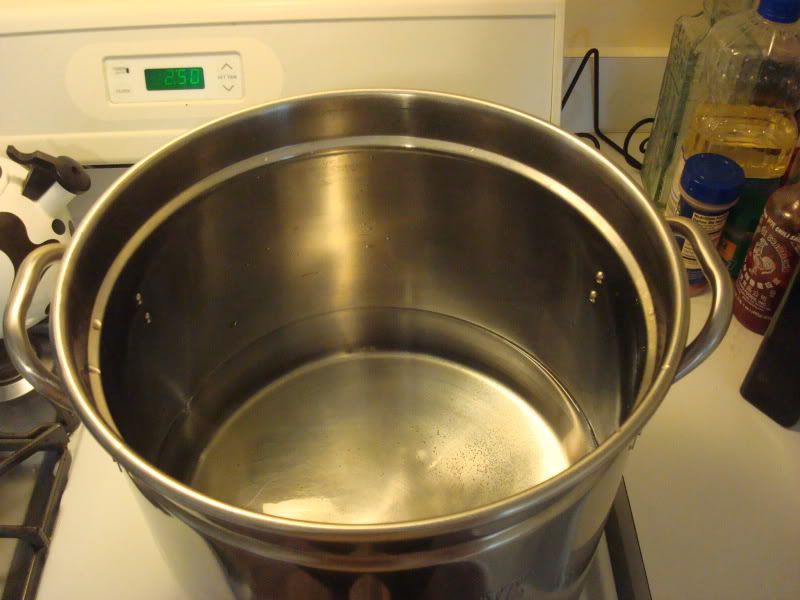
Now, we do themonster Marzen (partial) mash! That was a stretch. Anyway...We started by heating 1.5 gallons of water to 175° in our beer kettle (aka the Bayou Classic, as it says on the side), then add the mesh sack, dunking it a few times to fully submerge all the grain.


We moved the whole thing into the dining room to let fermentation begin. This is where the waiting game starts. It could take up to 72 hours for the beer to start fermenting, but ours started late that same evening. It's important to keep the beer in an area of the house where the temperature is steady aka not by a drafty door/window. After a couple days of fermenting at room temperature, per the yeast instructions, we moved the entire bucket into our kegerator. Lagers spend most of their time fermenting at a cool temperature, so for some people, a basement might work. We are fortunate in that we have the kegerator for drinking beer, but can also set the temperature to cycle at a specific number, which allows us to use it for lagering as well.

Apart from this being our first brewing session in the new house, it was also a special occasion because we had the lovely opportunity to host some company. Introducing...House Made brew. Guest starring Molly (my cousin) and Tom (her boyfriend).
People get all charmed and excited when they find out we brew our own beer out of our kitchen, like it's a glamorous hobby that puts us on a whole new level of 'cool.' Maybe kind of like Jesus with the water-into-wine thing, just not as quick (and without the religious following). Ok, I'm exaggerating. But really, watching water and grain boil is not that glamorous, and the only new level it takes us to is a new level of frugal (because it's cheaper to make quality craft beer than to buy it). In reality, WE are not that cool, but the end result is. Molly and Tom likely realized this, but hopefully they weren't too disappointed and still enjoyed our company.
So, how does the magic happen? Well, you need some basic equipment to get started.
Without getting into much detail, there are three ways to home brew: extract (most basic, typically using no to little actual grain, and is typically what a beer kit involves), partial-mash (using some extract + some grain), all-grain (most advanced, the name says it all). Extract-only brewing gives you the least control over the recipe, being more of a dump-and-stir method, while all-grain gives you the highest level of control over every aspect of the process. The first recipe we ever made was an extract + speciality grain recipe that we wrote ourselves - pretty ballsy of us, looking back - but we quickly jumped into partial mashing after that. Our recipes follow the partial mashing method because we don't have the equipment to do all-grain brewing yet, but it still gives us a decent amount of control and creativity over the end result. To write a recipe, we decide what style beer we want to make, research recipes that follow that style, pick out the desired characteristics we're looking for, then write up our own version with the guidance of a great gadget called BeerTools. Beer Tools let's us input all our info and shows us whether we are staying within the style guidelines. Added bonus - it let's us save our recipes too. There's only one recipe we've made that wasn't a Corrie/Darren Original, and we've been lucky enough that all but one of our own recipes have lived up to our expectations. Even the so-called 'failure' brew still had some big fans at our holiday party, so it wasn't completely unsuccessful.
Beers fall under two categories - either ale or lager. Ales are have their own yeast strains that ferment at warmer temperatures, while lagers have specific yeast strains that ferment at much colder temperatures. A commercial example of an ale is Guinness, while a commercial example of a lager is MGD or Budweiser, to give you an idea. But maybe you already knew that. I should give you more credit. Obviously there are many different styles of beer that fall under each category. The one we brewed this time is a Märzen, better known as an Oktoberfest style beer. This beer falls under the lager category and gets it's name because, historically, it was brewed in March (Märzen) and kept in cold storage (a cellar) until late summer/Oktoberfest. Fun fact of the day. Oh, and we named it "Dan-The-Man Marzen" after my cousin who's hosting the Oktoberfest party. It was a big hit last year, so by request, we're bringing it back for round numero dos.
That's the 'label' we made for the outside of the keg last year. Our first ridiculous attempt at using Gimp (aka free 'photoshop') by compiling a picture of Dan, a cheesy clip art, and scanning an image of a record we own (yes, the music is hilariously awesome in case you were wondering).
Let's begin with the basics. The grain for the partial-mash, which we had already measured out and crushed into a reusable mesh sack; lager yeast; and


We buy our ingredients from a local restaurant that has a brew-on-premisis facility, so we reuse one of their leftover containers to hold our malt extract. So if you were genuinely concerned that we put sour cream in our beer, fear not.
Now, we do the
The water temp usually falls a bit with the addition of the grain, so we had to bring it back up to between 148°-160°, which is the mashing temperature range. We tried to maintain it around 156°. You must maintain it between this range, which is the tricky part, because if you don’t the sugars wont extract properly from the grain, which is what mashing is all about. And sugars = fermentation = alcohol. Put a lid on it to preserve heat if you need to. You can add boiling or cold water to the mash to help you control it if you are having a hard time. The more precise your temp control, the more control you have over the flavor of your beer.
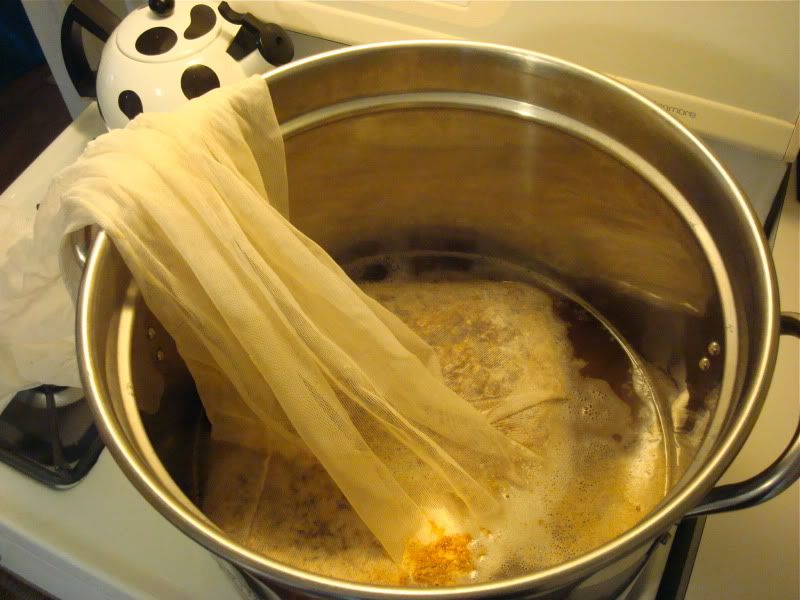
After a little more than 30 minutes, we sparged the grain with about 1.5 gallons of hot water. As Darren says, Sparging is a fancy way to say "pour hot liquid over the grain to try to get as much flavor out of the grain as possible." In fact, I think that is exactly what he was explaining to Tom as I took this pic.
Tom lifted the bag out of the water, letting it drain, and poured the sparge water through to rinse more sugars into the pot. Sugar mixes better with hot water (as you might know from cooking in general) so it makes more mash-created malt sugars dissolve out of the grain and you’ll get a more efficient extraction (which means better adherence to your recipe). This is where muscles come in handy, because someone - in this case, Tom - gets to hold that heavy bag for awhile. Set the grain sack aside in a bowl and after it rests awhile, be sure to add any additional liquid that has drained out. So far, we've essentially made grain tea, which has a technical name: wort. Not like warts. This is different (and not as gross.) In fact, it smells delicious. At this point, we have sweet wort, which is basically unconcentrated malt extract. Like the extract, this sweet wort is made up of water and sugars, most of which will ferment into alcohol and CO2, but a few which will not ferment and instead add to the flavor and sweetness of the beer. The extract helps bulk up and moderate your wort, which is good in case you made mistakes during the mashing part - hence the advantage of partial mashing.
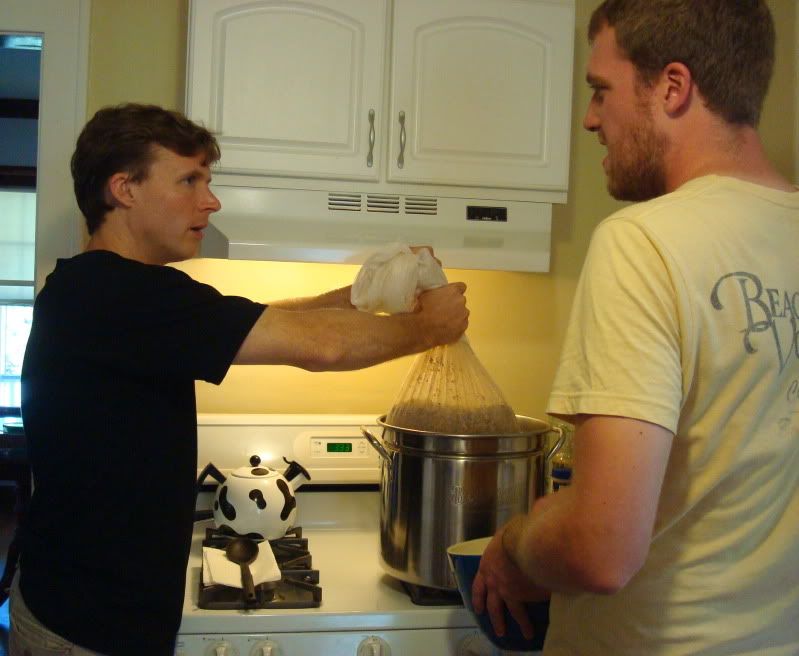
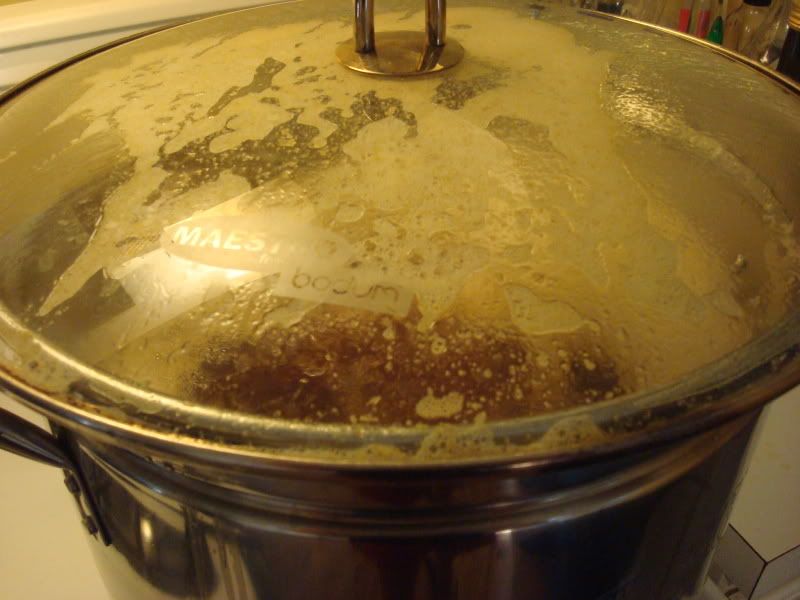
So now there's about 3 gallons of wort in the kettle. This part of the process is called the boil. Why not boil the whole 5 gallon batch at once? Well, your typical kitchen stove probably isn’t powerful enough to handle boiling that much water. Plus, you will have to cool everything down later to a specific temperature range for the yeast to work, so by only boiling part of the water, you can later top it off with cool water to assist in the cooling process.We turned the heat up to high and mixed in the malt extract, which kind of looks like syrup.
Darren poured, while Molly stirred. It's important to stir constantly until the extract is fully incorporated into the liquid, otherwise it will settle and burn on the bottom.
Then we waited for the wort to boil. This is the part where you drink beer, if you haven't started already. Tom brought an Imperial Hefeweizen he brewed on premises at The Brew Kettle (the place we bought our supplies).

Your boil will last 60 min, but you don’t start the clock until you have a steady rolling boil. As you wait for this to happen, be sure to keep a close eye on the pot, because it could go from calm to overflowing in a hot second. No pun intended.
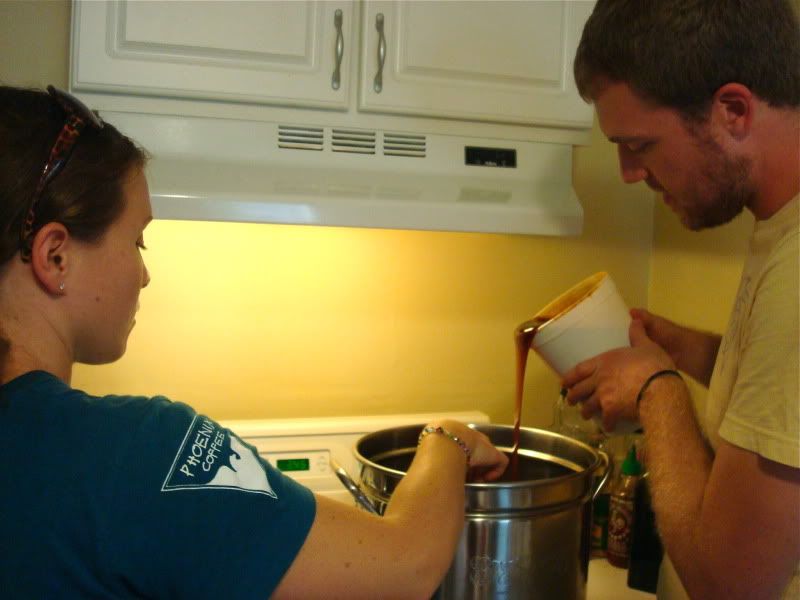
Once we achieved a rolling boil, we started the timer. The hops needed to be added at certain times, according to the recipe as the time counts down. For ours, we added 1 bag at the 45 minute mark and 1 bag at 5 minutes. Each bag contained 1 ounce of a different type of hops.
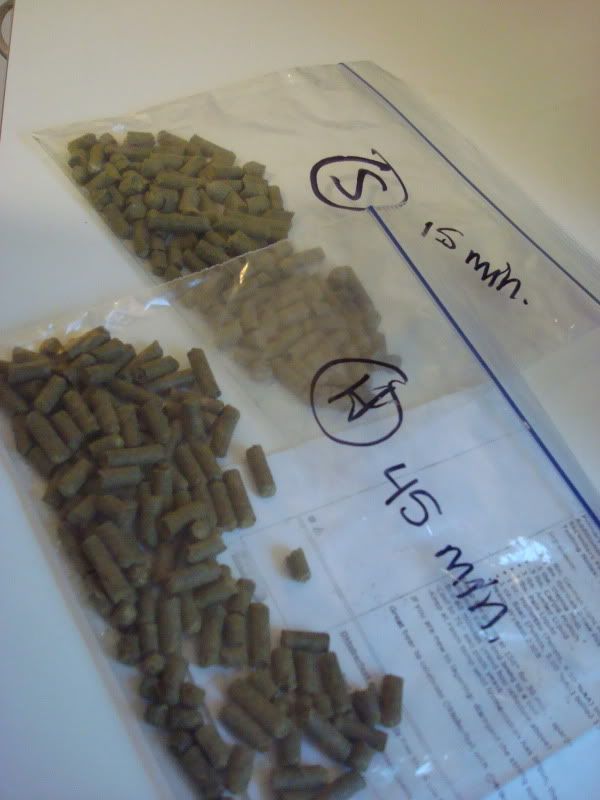
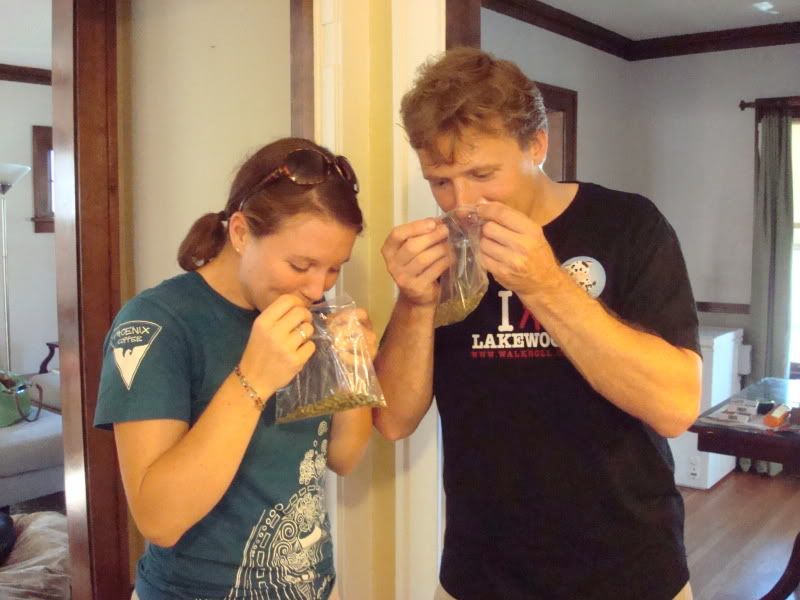
Molly and Tom had to do the requisite hop sniff test. Generally speaking, adding hops at the beginning of the boil serves the purpose of contributing bitterness (necessary for balancing out the sweetness of the wort); adding hops between the 15 minute and 5 minute timeframe contributes flavor; and those added from 5 minutes until the end are mostly for aroma. Hop pellets - the kind we used - disperse quickly so there’s no need to stir.
While we had 60 minutes of boil time to kill, we used this as an opportune time todrink more beer sanitize everything that would come in contact with the wort post-boil. For some reason, I always feel a little Beastie Boys taking over at this point...I'm tellin' ya'll it's sabotage let's sanitize! For anyone who wants a '90s flashback (or has no idea what the heck I'm talking about), here's a video.
Your boil will last 60 min, but you don’t start the clock until you have a steady rolling boil. As you wait for this to happen, be sure to keep a close eye on the pot, because it could go from calm to overflowing in a hot second. No pun intended.
Once we achieved a rolling boil, we started the timer. The hops needed to be added at certain times, according to the recipe as the time counts down. For ours, we added 1 bag at the 45 minute mark and 1 bag at 5 minutes. Each bag contained 1 ounce of a different type of hops.
Molly and Tom had to do the requisite hop sniff test. Generally speaking, adding hops at the beginning of the boil serves the purpose of contributing bitterness (necessary for balancing out the sweetness of the wort); adding hops between the 15 minute and 5 minute timeframe contributes flavor; and those added from 5 minutes until the end are mostly for aroma. Hop pellets - the kind we used - disperse quickly so there’s no need to stir.
While we had 60 minutes of boil time to kill, we used this as an opportune time to
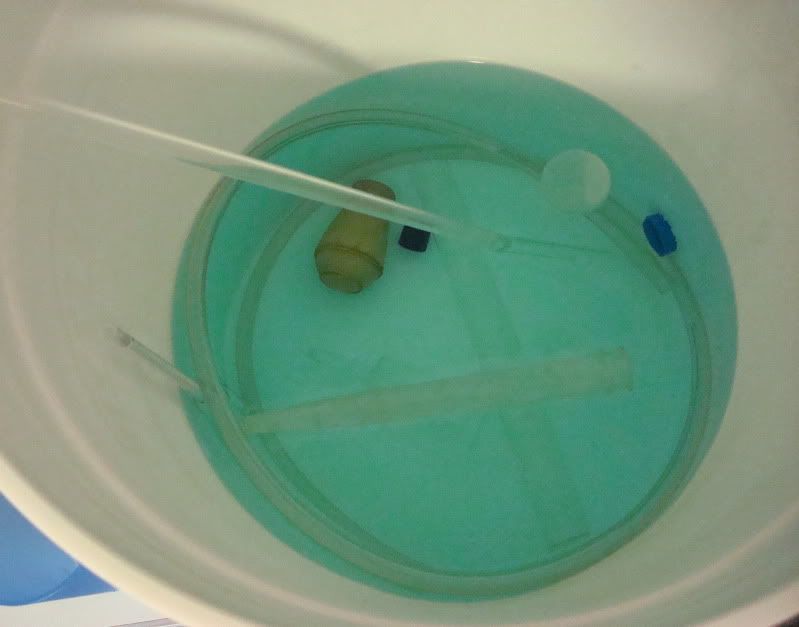
This was our bucket of stuff being sanitized:
That sanitizing solution kills HIV/AIDS. No joke. It says it on the bottle.
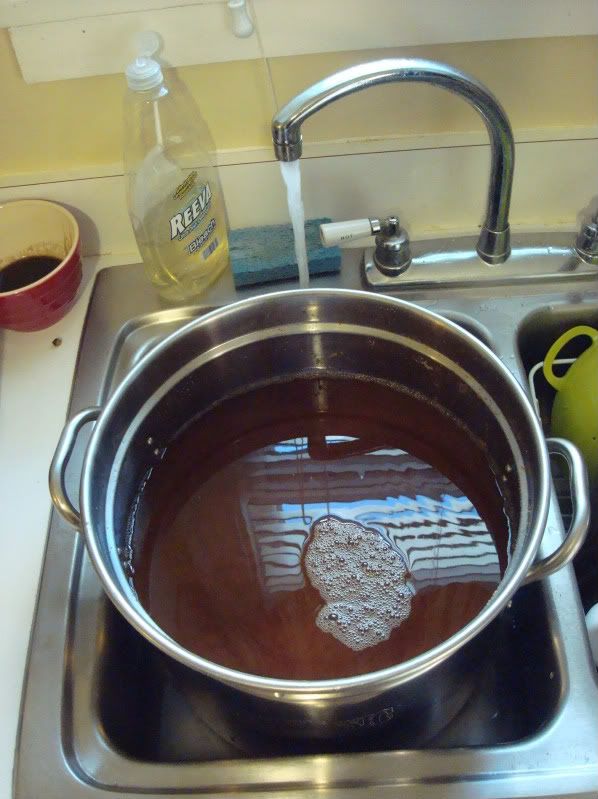
When the boil clock reaches zero, turn off the heat and remove the pan. The new goal is to cool the wort as quickly as possible while keeping it as sterile as possible. This is not only in your best interest from a time standpoint, but also because the longer it takes to cool, the more susceptible the wort is to contamination and resulting off-flavors now that it's no longer being heated. The fastest way is to use a funky gadget called a wort chiller, specially designed for this purpose. However, we do not have one, so we do it the annoyingly long cheap way and make a cold water bath in our sink.
Eek! That sponge should not have been there...Also, it might be hard to tell, but the water is going into the sink, not that pot. Darren stirred the wort a bit - with a sanitized spoon of course - to help release more heat. As the wort cools about halfway and the water bath doesn't seem to be as effective, we add ice to the water bath to help move things along. (Sidenote: If you are brewing in winter, you might think putting it in the snow is a genius idea. It won’t work.) As the wort only has about 10 degrees to go, we move it into the bucket it will ferment in and top it off.
Oh, hey, feet.
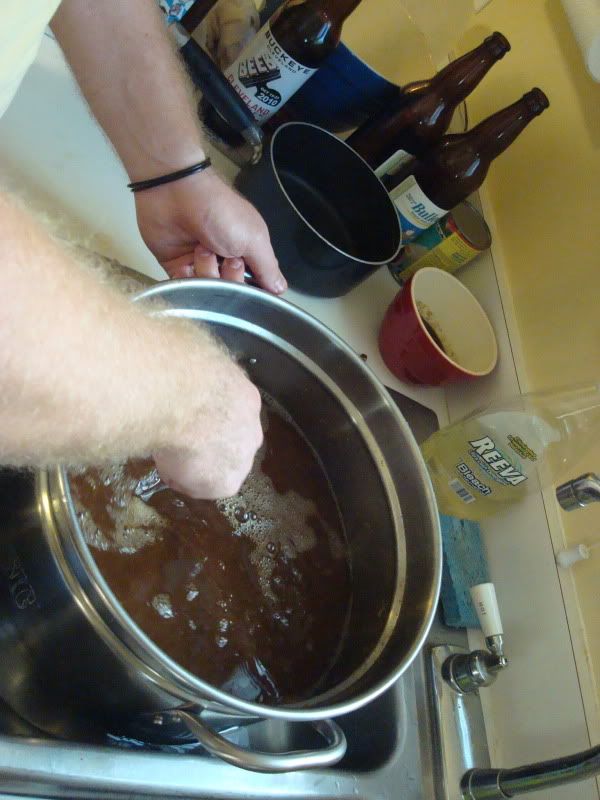
Connecting the sanitized tube and racking cane, we siphoned the wort into our fermenter, leaving behind all the icky gunk in the pot (called trub –it’s leftover malt proteins and hop particles).

Gross. (Darren is a good sport and does cleanup duty.) We topped off the wort with cool spring water, bringing the volume up to 5 gallons and the temp down to right where we needed it (the exact number which I cannot remember right now). Then, we took a sample of the wort with a (sanitized) turkey baster (who says you can only use them at Thanksgiving?) and put it into our (sanitized) hydrometer tube to measure the Original Gravity.
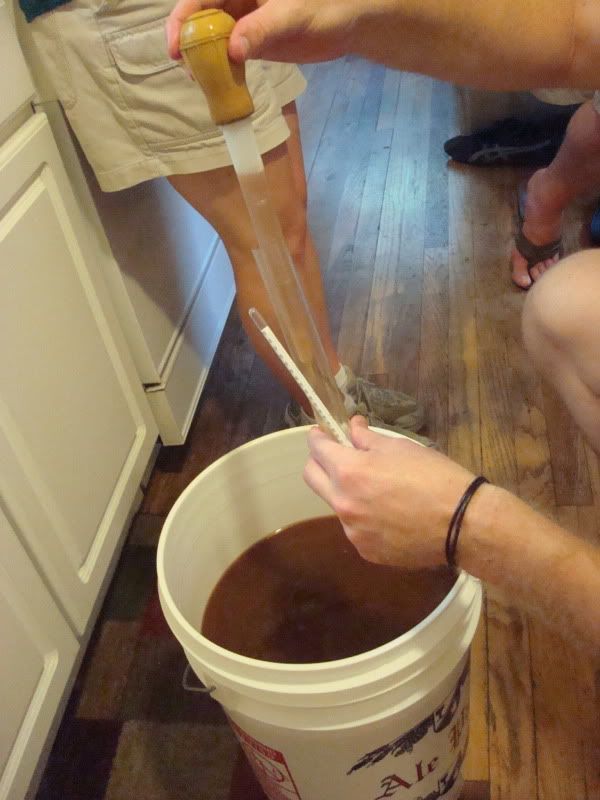
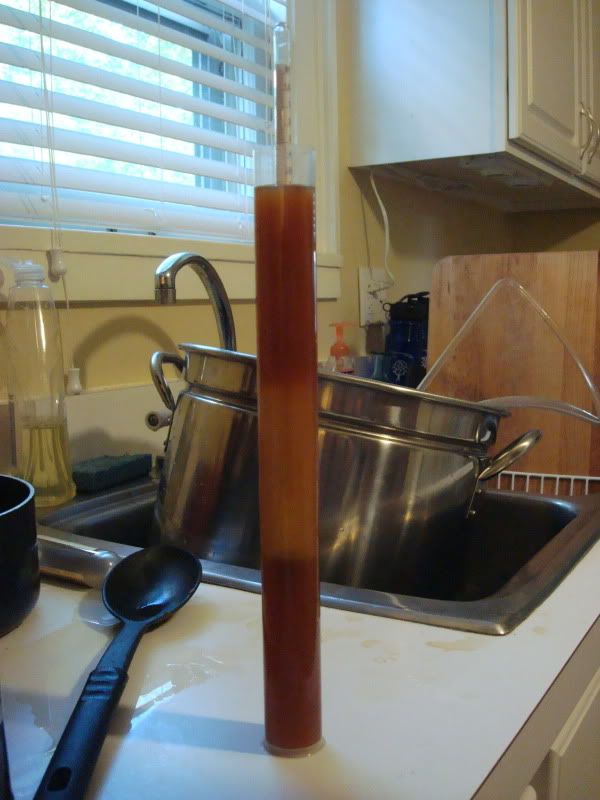
We gave the hydrometer a spin to dispel any bubbles, then waited for it to settle and read the number at the point where the top of the liquid meets the instrument. This number - the gravity - is a reading of the density of the beer, specifically the amount of sugars present. As the beer ferments and sugar turns to alcohol and CO2, the gravity drops. By looking at the original gravity/sugar content, you can get an idea of how high in alcohol your beer will be. (BeerTools gives us estimated numbers when we input our recipe, which gives us an idea of how far along the fermentation is as we take additional readings).
Then, we added the yeast and give the thing a stir, which helped oxygenate the wort and activate the yeast. Ale yeast ferments 62° -75°ish, while lager yeast (what we used because we're making a lager) ferments around 50° - 60°, though it can be pitched at a higher temp initially.

Connecting the sanitized tube and racking cane, we siphoned the wort into our fermenter, leaving behind all the icky gunk in the pot (called trub –it’s leftover malt proteins and hop particles).
We gave the hydrometer a spin to dispel any bubbles, then waited for it to settle and read the number at the point where the top of the liquid meets the instrument. This number - the gravity - is a reading of the density of the beer, specifically the amount of sugars present. As the beer ferments and sugar turns to alcohol and CO2, the gravity drops. By looking at the original gravity/sugar content, you can get an idea of how high in alcohol your beer will be. (BeerTools gives us estimated numbers when we input our recipe, which gives us an idea of how far along the fermentation is as we take additional readings).
Then, we added the yeast and give the thing a stir, which helped oxygenate the wort and activate the yeast. Ale yeast ferments 62° -75°ish, while lager yeast (what we used because we're making a lager) ferments around 50° - 60°, though it can be pitched at a higher temp initially.
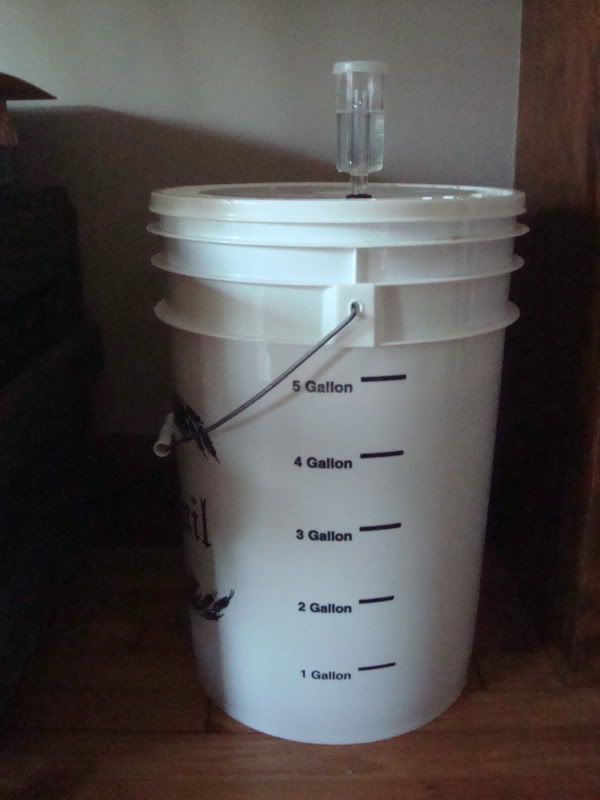
Finally, we attached lid. The lid has a hole in it where the airlock goes (if you are using a carboy to ferment in, you need a stopper with a hole for the airlock). We filled the airlock halfway full with sanitizing solution, capped it, and inserted it in the lid. It acts almost as a filtration device for the CO2 released during fermentation, which you see in the form of bubbles inside the airlock.
We moved the whole thing into the dining room to let fermentation begin. This is where the waiting game starts. It could take up to 72 hours for the beer to start fermenting, but ours started late that same evening. It's important to keep the beer in an area of the house where the temperature is steady aka not by a drafty door/window. After a couple days of fermenting at room temperature, per the yeast instructions, we moved the entire bucket into our kegerator. Lagers spend most of their time fermenting at a cool temperature, so for some people, a basement might work. We are fortunate in that we have the kegerator for drinking beer, but can also set the temperature to cycle at a specific number, which allows us to use it for lagering as well.
Almost three weeks later, we are still waiting. At the beginning of this week we took another hydrometer reading and decided the beer was ready to move to secondary fermentation, which is basically another step of fermentation where you rack (siphon) the the beer out of the old container, removing it from the yeast that has settled to the bototm, and into a new carboy. Some people think secondary fermentation is optional, but we always do it because it helps clear out extra sediment in the beer and we think it helps improve flavor.
So that's where our little beer is at right now, and where it will probably stay for another week or so until we actual move it into the kegs and carbonate it. A whole new adventure! We were glad to have Tom and Molly over to learn about home brewing, and we hope you learned something as well. Or at least fulfilled any curiosities about what goes on behind closed doors. Did you ever think brewing beer could be so science-y?
We'll be sure to update you when it's time for some kegerator/carbonating action!
Cheers!

