Showing posts with label Fabric. Show all posts
1

Playing Hard to Get

Posted by Corrie on 10:26 PM in ,
I have a confession to make. I'm in love.

With Darren...yes. But there is another.

This week, I began an unhealthy love affair with Chaing Mai.


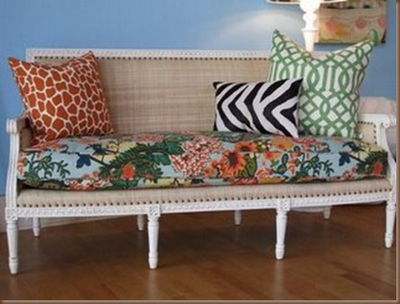
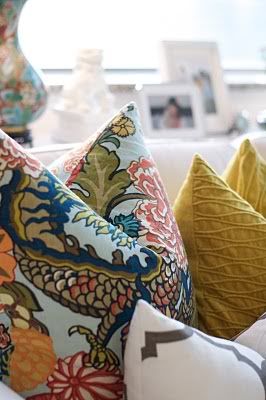
I know...Chaing Mai is a little crazy. And has been around the block a few times - for a few years in fact. But I just can't resist.

Courtesy of The Desk of Annie

Courtesy of Caitlin Wilson Design

So complex. So much personality. It was love at first sight.

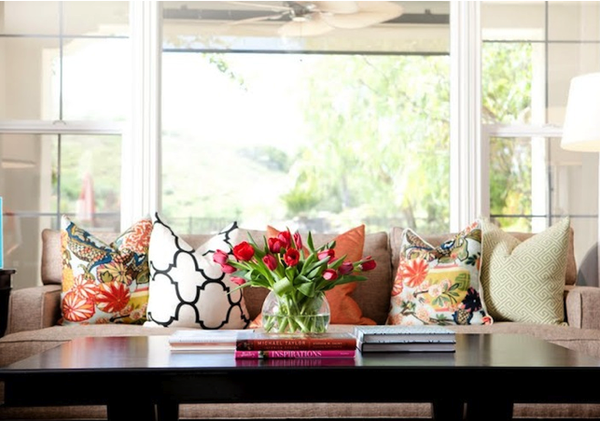
Courtesy of Yay Decor
Couldn't you just see it making a home as a pillow on my couch?


The seemingly random pattern that's so easy to pair with other patterns. That perfect mix of colors found throughout my house. The piece de resistance of my entire first floor. Oh, the places you'll it'll go!

 Oh, the drama.

.:Sigh:. But I forgot to mention a minor little detail. This is only a visual love affair for now, because I ain't no sugar momma. Think $140 per yard. Ouch.  On top of the price, it's a designer fabric made by Schumacher (whose fabrics I'm obsessed with, by the way) so it's playing hard to get. I've searched Ebay and Etsy but with nothing very reasonable to be found. The best I could find was a pair of pillows made with the fabric (only on one side) for $100. Still way out of my meager DIY budget. And there's nothing comparable that satisfies me.

Soooo for now I suppose I am left to dream. And keep stalking Ebay. And Etsy. And maybe save my pennies. And maybe make some calls to some local fabric/upholstery places to see if they might have any remnants.

And, hey! Any of you out there! Can you help a sister out? Do you or anyone you know have any scraps of this fabric they would be willing to part with? Any idea where I might find some at a bargain price? Chaing Mai in aquamarine. The bane of my existence right now. (Pathetic to say about a piece of fabric, I know. But gosh does it seem so fitting for my house.)

In the meantime, I'm going to focus on finding some orange curtains. Yep, orange. And picking a paint color so we can get our bedroom makeover. It's about to get crazy in here, kids.


3

Pillow Talk

Posted by Corrie on 8:59 PM in , , , ,
As you might have noticed in our house tour post, things are still looking a little blah in the décor department. That might have something to do with my inability to make decisions about where to put anything. And the fact that much of it is still tucked in boxes in our breakfast nook, nice and out of the way... which you would think would be a good thing, but actually isn’t because it keeps me from tripping over and cursing at it every day, both of which seem to be prerequisites for motivating me to actually do something with it. I digress. Since I’ve been all non-committal about our other décor, I thought pillows would be a great place to start. They’re useful (Darren would beg to differ) and an easy way to cheer up or change up a space.  I figured I would just make new covers for our already-owned pillows (most of which currently match our hand-me-down couch)...but you probably know that’s easier said than done. Making actually requires doing, and I haven’t been doing any doing when it comes to décor this summer. Phew. Try saying that three times fast.  

Anyway, I got a swift kick in the motivation-pants over the past week when I read about a Pinterest Challenge being hosted on one my favorite blogs, Young House Love. Pinterest is like an online inspiration/project binder where you can create visual bookmarks of everything that catches your eye. You ‘pin’ things to a ‘board’ (essentially a folder) with a note to remind yourself why you’re obsessing over it. The problem with Pinterest is that I have pinned so many project ideas but haven’t done most of them yet. Apparently other people have this problem too, hence the Pinterest Challenge. Deadline: Today. Aw shoot.

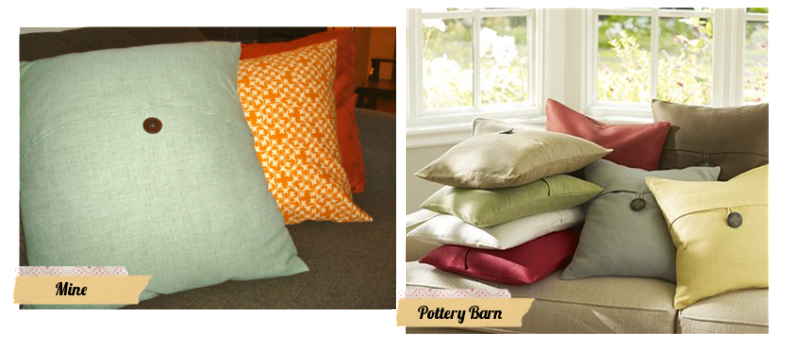
And so, I paid a little visit to my Pinterest pillow inspiration (pillow pinspiration?), these beauts from Pottery Barn:
As much as I’m a lover of most things Pottery Barn – their stuff fits the casual but collected look I’m going for - we’re on more of a Target kind of budget. So at $25 per slipcover (not including the pillow insert!), these suckers were put on the ‘to make’, not the ‘to buy’ list. They look pretty simple after all...so it’s Pottery Barn knockoff time baby. (I accidentally typed ‘Potty Barn knockoff’ the first time and giggled to myself. No one wants a knockoff of that. Maybe you had to be there.)  

Back in March, a local Joann Fabrics store was going out of business and having a crazy 50-75% off sale. Knowing we would be moving in April, and anticipating making some pillow covers, I ran over there like a crazy person to buy up the whole store stock up on some fabric. $94 and $131.52 in savings later, I came home with a whole slew of future project supplies, including those for this project: 


Buttons: $1.25 at 50% off (org. $2.50 each)
Indoor/Outdoor Fabric (sturdy and washable to hold up to large dog and people abuse): Marlin Linen Spa , $9.99 for 2 yards at 75% off (orig. $39.98 - $19.99 per yd). 
Thread - $2.99
Pillows – already owned.
Sewing Machine - already owned. It's a White Sewing Machine from the 50's that I found at a festival for $30 - score! Even better, it was made here in Cleveland. I also adore that it's turquoise and had to share a pic.


You probably just realized that I have had the supplies for these pillows sitting in my house for 4 months now. Queen of Procrastination? This kid right here.

I made a basic envelope style pillow cover on Sunday - for which you can find many tutorials online – and realized that the Pottery Barn pillows were essentially just an envelope style pillow cover, but with the opening in front and a decorative-but-functional button closure. This (the back of the envelope style pillow I made on Sunday) vs. This (Pottery Barn's Textured Linen Pillow Covers):


See what I mean? So here’s how I did it. First, measure your pillow. Mine was 20”x20”. You will measure and cut one long piece of fabric to wrap around your pillow (why do extra sewing if you don’t have to?) and calculate it like this:

Front pillow length + Back pillow length + 2” for seams + 3” for envelope overlap. 

In my case this was 20”+20”+2”+3” = 45” for the length. For the width of the pillow, add ½” for seam allowance so you have a snug fit. The dimensions of the fabric I cut were 45”x20 ½” for my 20”x20” pillows. Make sure when you are marking out your measurements that you are doing it on the wrong side of the fabric (wrong side generally = unprinted side). Now cut.it.out (image 1). (Uncle Joey from Full House? Anyone?)

                  
Because you want finished edges on the envelope part of the pillow since it will be facing front, you will double hem the top and bottom ends.  To do this, you fold and press down ½” seam (image 2). Then fold it over ½” and press it down again (image 3). (You might need to pin it to hold it in place while you take it to the sewing machine.) Then sew a ¼” seam down the edge of each of your double hems. 

With the fabric laying right side up, fold in the top part (image 4), then the bottom part, overlapping them by 3” (image 5). Since I wanted my fold to sit just above center on the front of my pillow, I folded the top part down 9” and the bottom part up 14”. This left me with a 20” square with 3” of overlapping fabric (image 6).  I pinned the top, bottom and overlapping pieces in place, then sewed a ½” seam allowance up each open side of the pillow (image 7).

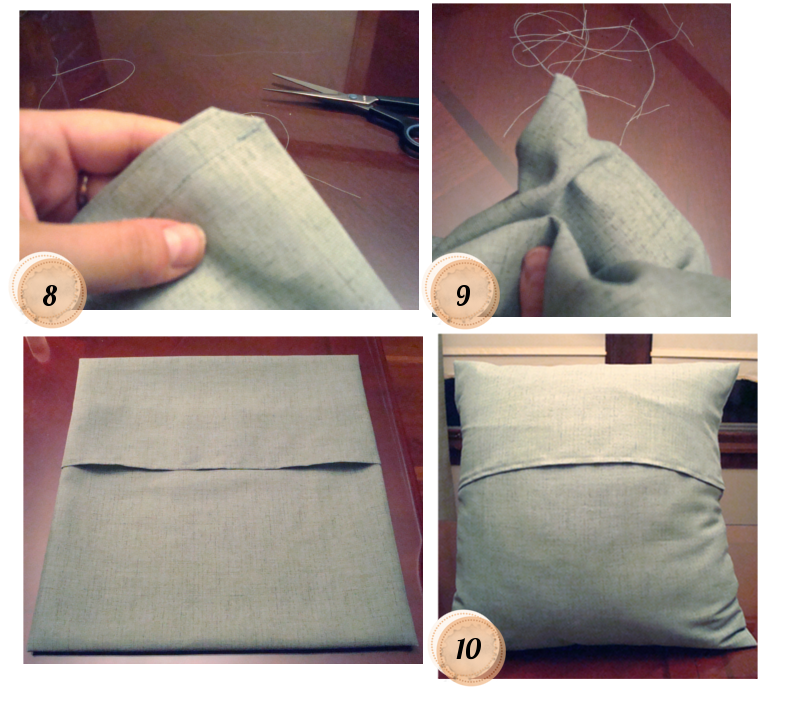
I clipped each corner of the pillow at an angle (image 8), then turned the whole thing right-side out and used a closed pair of scissors to push out nice points in the pillow corners (image 9). Aaaand insert pillow (image 10).

But wait! There’s more! 

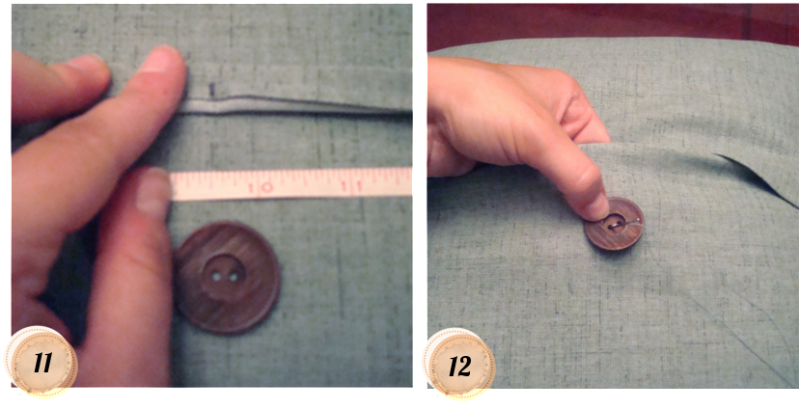
I wanted my pillow to have that fun/functional button closure, remember? So with the envelope fold side of the pillow facing frontward, I measured halfway in from the side and positioned my button where I wanted it to go (image 11).


I made an inconspicuous little mark on the fabric underneath where the button would be for an easy reference point – it would be covered once the button was sewn on anyway. Then I attached it (image 12).  Sew So what about that loop thing that goes around the button? Well, I had to make that too, and it was honestly probably the only difficult part of this project. I suppose I could’ve just sewn one of my unused hair bands to the underside of the flap to create an easy loop closure solution, but I wanted the loop to match the fabric for a more polished look.

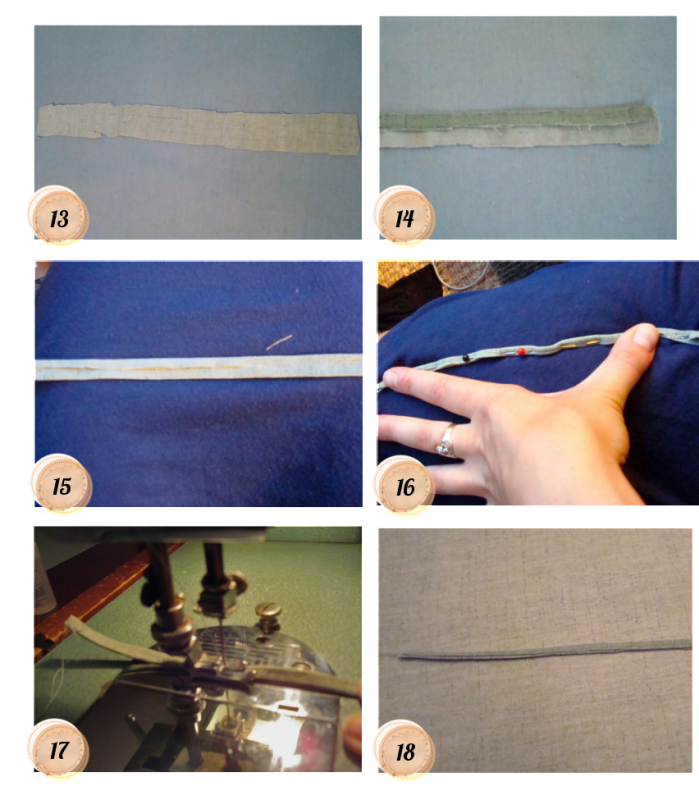
I cut out a 1” wide strip of fabric that was a few inches long (I didn’t measure since I knew I would trim it down anyway) and took it to the ironing board (image 13). With the wrong side facing up, I folded one long side so its edge was touching the center and ironed it (image 14). Then I did the same with the other long side. At this point, I realized that the skinny little flaps still weren’t laying as flat as I wanted, so I said screw it unfolded the flaps, ran some Fabri-Tac fabric glue down the center, and refolded the flaps. Voila. Nice and flat (image 15).  This was important, because I still had to fold the fabric AGAIN. This time completely in half. I pinned it closed (because it wouldn’t stay closed on its own) (image 16) and then sewed right up the center for the length of the folded fabric (image 17). The trick to this is not sewing your fingers off going really slow and straight since you don’t have a whole lot of wiggle room. When you’re done, you have a nice custom ‘cord’ for your button loop iImage 18)!

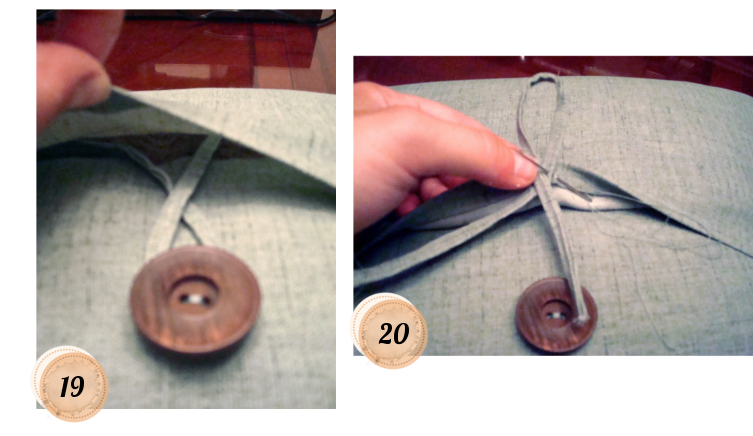
I fitted it around my button, crossing the ends in an ‘X’ on the underside of the envelope flap (image 19), then hand-sewed it on (image 20). There was some excess cording left, so I just trimmed it off.


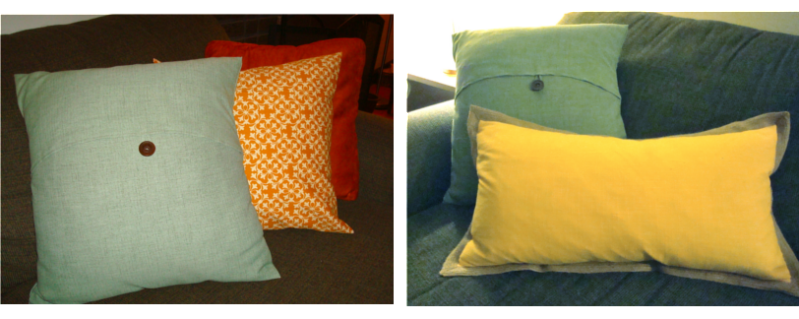
And there you have it! Pottery Barn pillows for a fraction of the price...about $4.50 per pillow, actually (recap: free currently-owned pillow, $1.25 for the button, about $3 for less than a yard of fabric, maybe $0.25 worth of thread). I actually ended up making two of them. (The colors in the pic on the right are not very accurate - I took it at night and the lighting is bad.) I'd say the final comparison is pretty close: 


And where was Darren during all of this? Here’s a video that pretty much sums up his feelings about my pillow endeavors (thankfully he doesn't take it to this extreme).


Guys and their weird pillow issues.

4

If You're Feeling Board

Posted by Corrie on 2:17 PM in , ,
Yes, that was a purposeful misspelling. What I REALLY meant to say was if you're feeling bored with your boards - cork boards that is - I have a fun little project to share with you. Today was Darren's twin nieces' 10th birthday (I can't believe they are already 10! I remember feeling so 'grown up' when I reached the double digits...) and they had asked for cork boards for their bedrooms. Ironically, in my recent browsing around the internet, I had come across some DIY tutorials on fabric covered cork boards, so I thought this would be a perfect opportunity to try them out. Soooo today we are taking a little reprieve from the house tour because I'm still editing photos to share with you a fun way to jazz up those old boring cork boards you have sitting around your house.

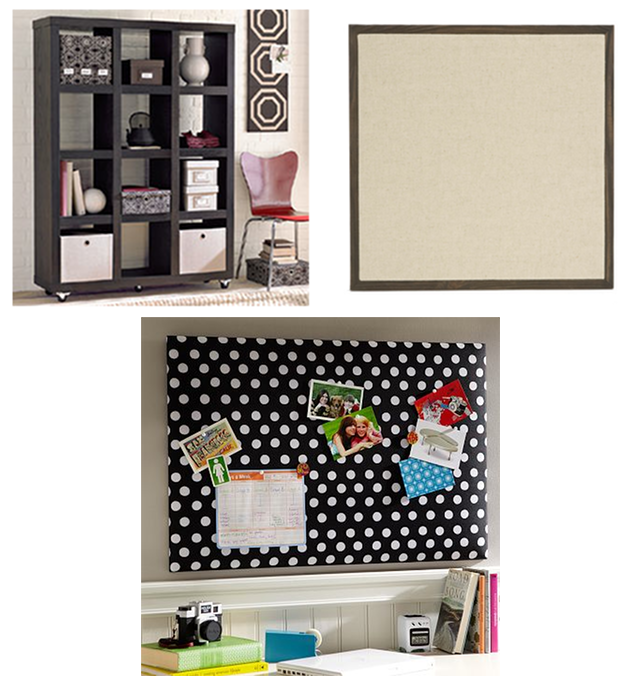
Cork boards seem to be making a comeback in home decor for both kids and adults as an obviously practical organization tool. But let's be honest. They aren't exactly attractive on their own. Though some of my favorite stores to window shop are currently selling some more stylish versions of the standard cork board, I thought I could do way better on my own in terms of price.


Clockwise: West Elm pushpin canvas board $59 (no longer available); The Container Store Linen Bulletin Board 15" $29.99;  PB Teen White Dot Post-It Pinboard 24"x36" $79 (on sale $69)


Knowing the girls wanted the kind of board you use push pins with - instead of a memo board which typically has criss-crossed ribbons that you tuck things under - I browsed around the interwebs for some different tutorials. What I ended up doing was kind of a mix of a few different methods.

First, I dragged Darren with me to Joann Fabrics since he was footing the bill to help me pick out fabrics that would be fitting for the twins rooms. Despite being twins, the girls have very different personalities and interests so I didn't want to make matching boards. They also have their own rooms - which they have recently started redecorating from what I understand - so I wanted to pick something out that still reflected their girly sides but was a little more sophisticated now that they are getting older. Although the new decor for their rooms would incorporate a number of colors, one of the girls loves pink, and the other purple.

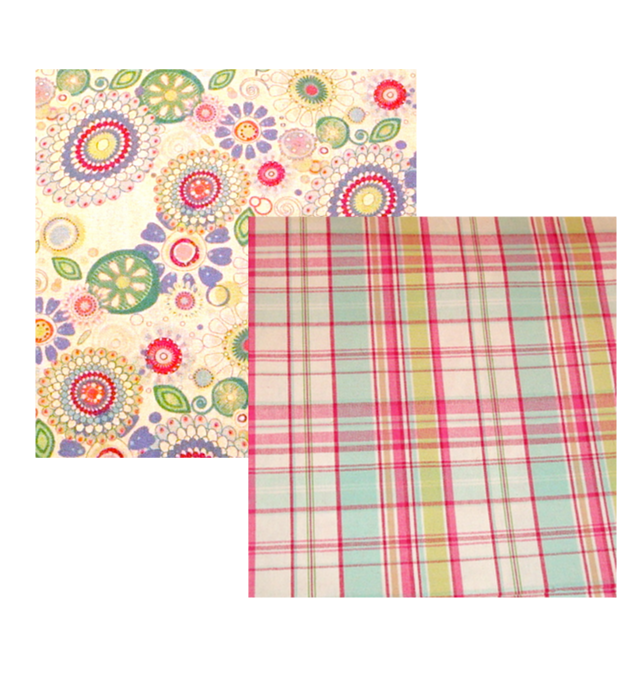
We scanned through the sale section first and narrowed it down to two fabrics, which were each $2 off per yard.
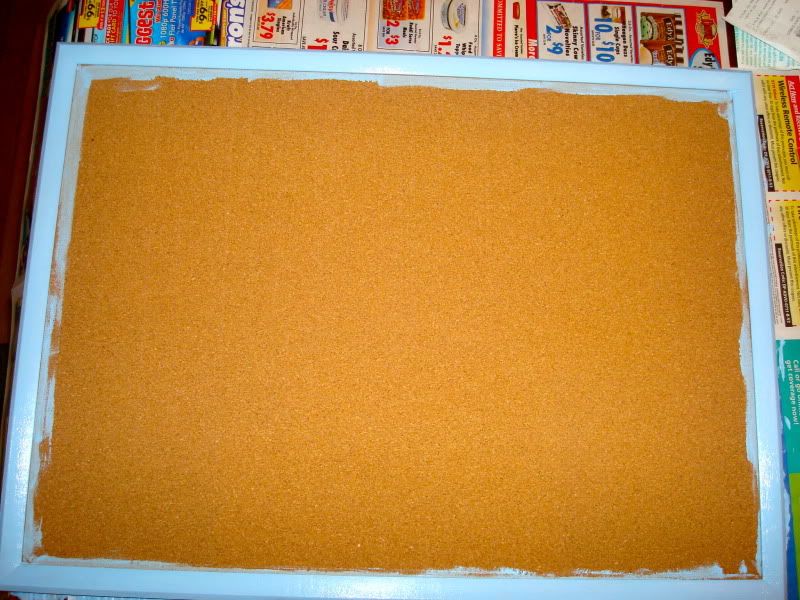
Since each fabric was 42" or more in width, and our cork board dimensions were only 17"x24", we knew that only half a yard would be plenty of fabric. (I realized later that a quarter yard - or a 'fat quarter' in fancy sewing terms - might be enough of some people, but it would've been just barely too short to cover our boards. Fat quarters are often sold in precut bundles and are very cheap.) After grabbing our fabrics, we went off in search of paint for the frames and ribbon for the trim. Since the fabrics we chose had similar accent colors - light blue and pale green - I decided to paint both frames light blue and use pale green ribbon around the edges of the cork. This turned out to be more cost effective because I only needed to buy one small bottle of paint and one roll of ribbon to put together both boards (instead of different ribbon and paint for each one). When we got home, my set up looked something like this:


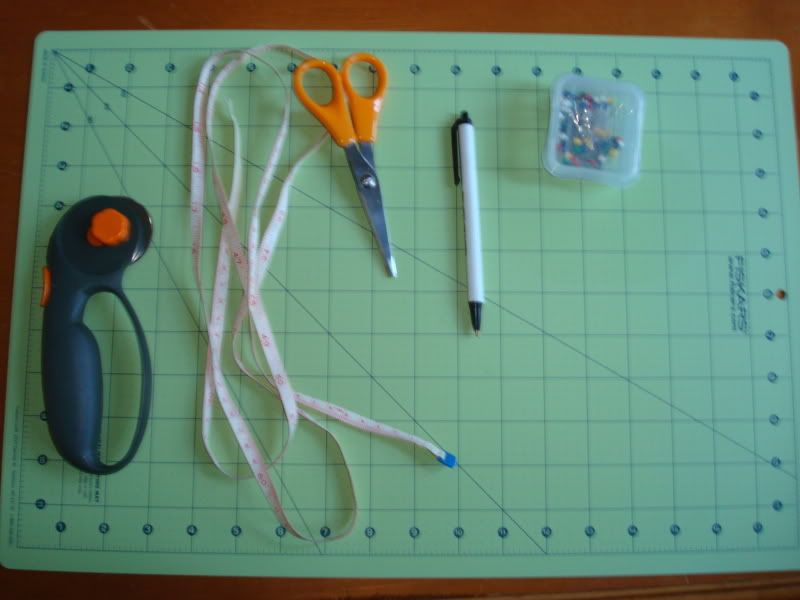
My supplies were fabric, the cork boards, paint, a dish for the paint, ribbon, a foam paintbrush, spray adhesive, Fabri-Tac (a fabric glue), scissors, a knife, a fabric cutting mat and fabric cutter. Since I was doing this on my glass top dining room table, I laid down a bunch of newspaper first so I didn't end up with a painty gluey mess all over the place. (Well, I had a painty gluey mess anyway, but at least it was on newspaper and not on my table.) I painted the frames first and didn't worry about being too careful not to get paint on the cork since it would be covered anyway. They took 3 coats of paint each since the wood frames had some sort of shiny finish on them that caused the first couple coats to look a little streaky. I might take the time to sand the frames a bit before painting next time, just to roughen them a tad and make the paint adhere better. And so far we have this:


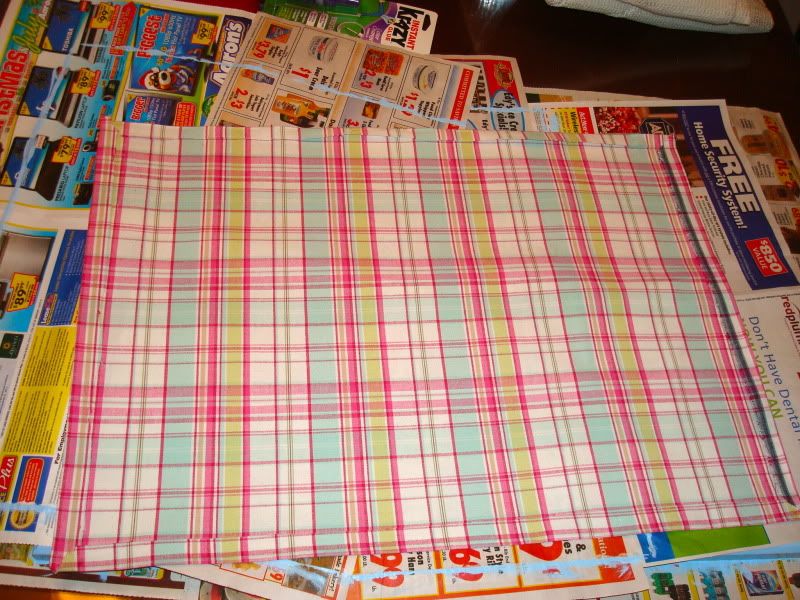
Let's pretty it up. I laid my fabric right side down on the cork board, took a pen, and traced just barely wider than where the cork meets the frame. Very technical measuring, because I'm a very technical person, obviously. Then I use my fabric cutter and mat to cut along the lines I had traced. You could use scissors for this, but a fabric cutter is much quicker and cuts a clean straight line. At this point, I have to be honest and tell you that I got too fancy for my own good on the first board and attempted to tuck under all the edges by gluing a faux-hem with the Fabri-Tac so the fabric would have nice clean edges in hopes of perfectly aligning with the wood frame. 


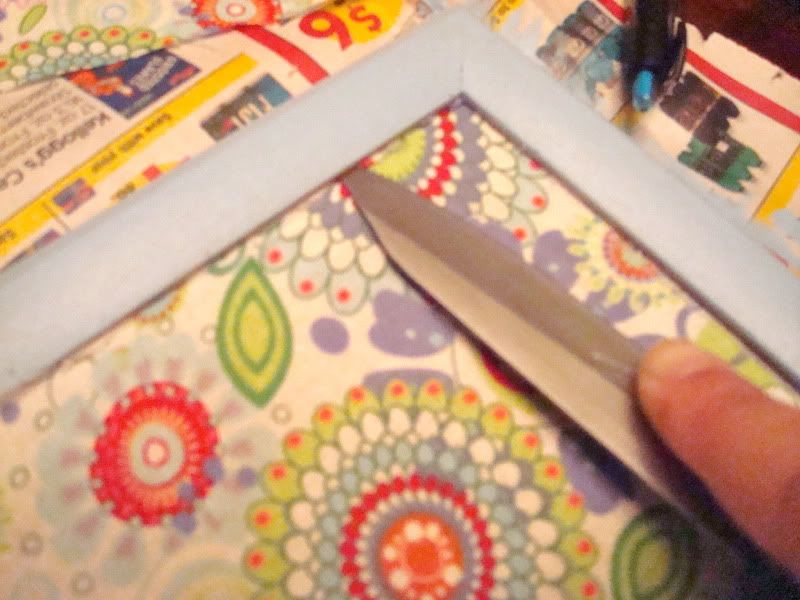
Then I came to my senses, got over my type-A personality (momentarily) and realized it wouldn't create a perfectly gapless seam between the frame and fabric. I was wasting my time. No matter how hard I tried, there would always be a little sliver of cork showing through near one of the edges. So, with the fabric still turned right side down, I sprayed the entire back generously with adhesive spray then carefully align it on top of the cork. (Warning: do this away from the cork boards and anything else you don't want to end up with a sticky film all over it when you are done spraying.) Starting from the center ad working outward, I smoothed the fabric so there were no bubbles and creases. Any edges that might not have been sticking well got a little Fabri-Tac treatment to put them in their place. Since there were inevitably some places where the fabric was slightly overlapping the wood frame, I took a knife and tucked the fabric under the frame to secure it for a nice clean look, being careful not to pucker the fabric as I went along. 


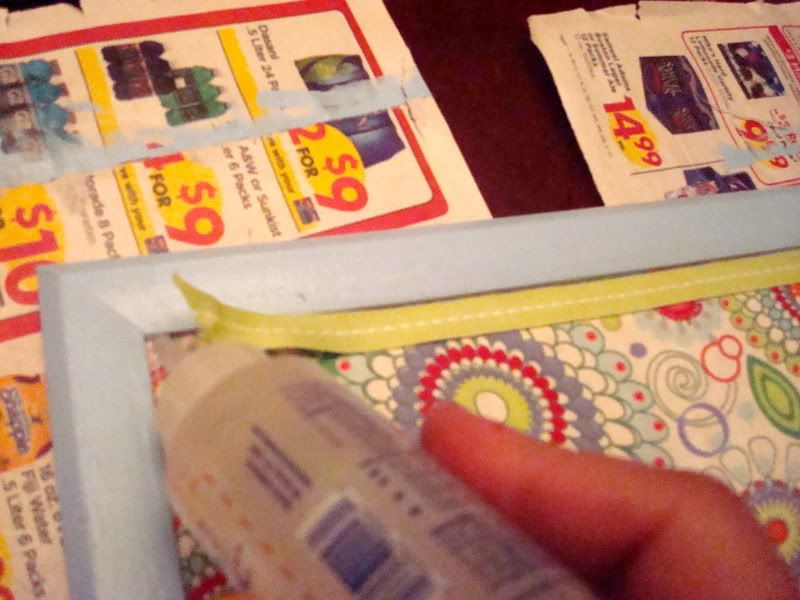
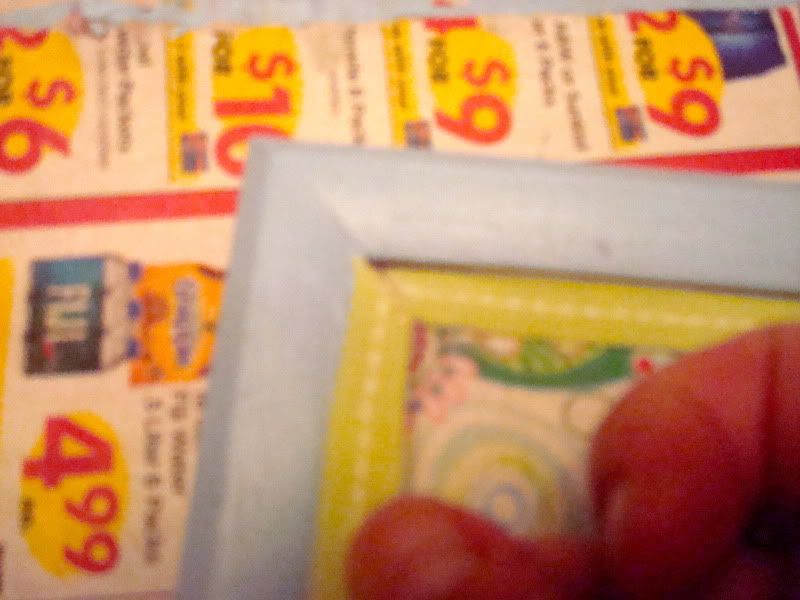
The final step was to cut the ribbon to fit along the cork on the inside edge of the frame. This serves a dual purpose of looking cute and covering and messy looking spots along the edges. Tricky, huh? I cut each end of the ribbons at an angle so that they would align together in a nice neat little corner then glued it all down with Fabri-Tac.


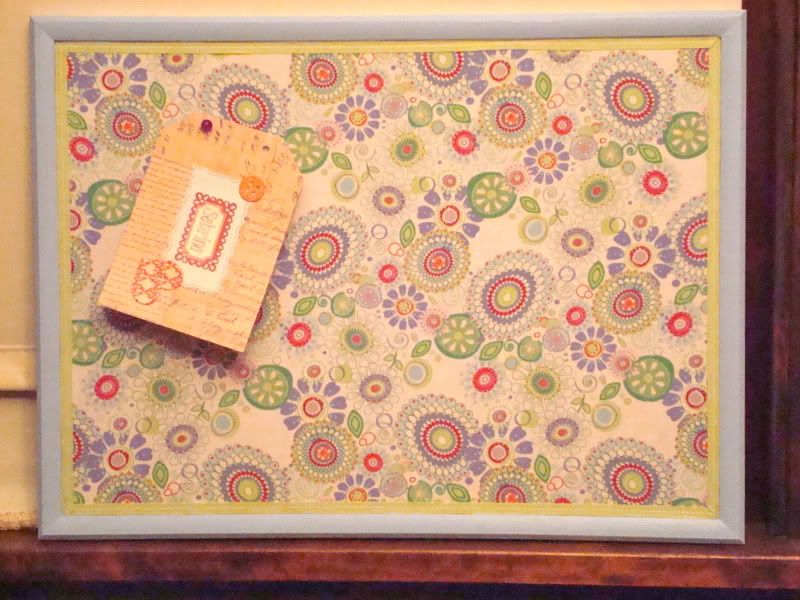
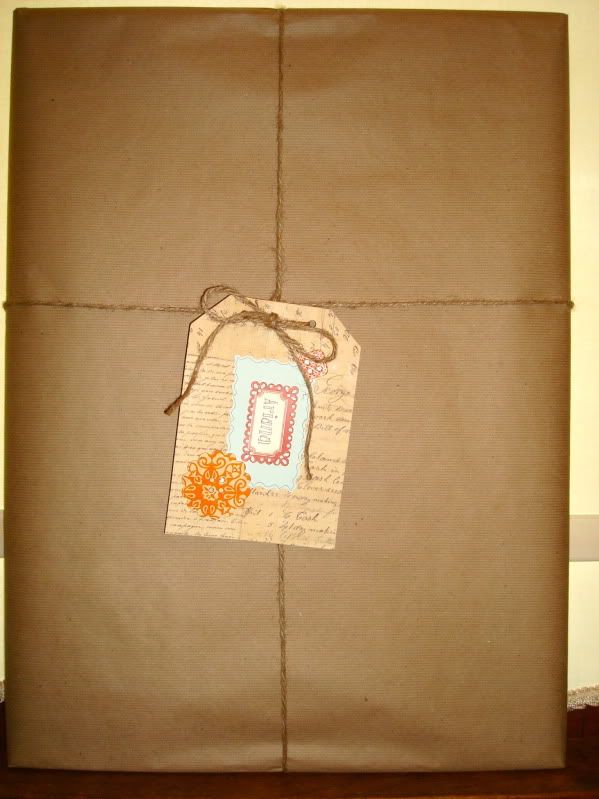
Done and done. Two fabric covered bulletin boards completed in one evening. I even had a little extra time before bed to make big tags with the girls' names to attach to the packages as a way to spruce up my cheap-but-slightly-less-than-exciting wrapping paper.


The plaid one is for A, who is a little more sporty, and the flowery one is for S, who is a little more artsy. They were really excited when they opened their gifts at dinner last night, and the look on S's face when she said "you MADE this?!" was priceless. I hope they enjoy having something unique and functional for their rooms, and especially that they get a lot of use out of their cute little corkboards (with push pins to match). In fact, I'm thinking we could use some of these in our office...Maybe I'll make a couple 'grown up' versions for Darren and I to hang above our desks. Perhaps with burlap or linen or something...the wheels are already turning...

Oh, but wait. The final cost? Less than $30 to make BOTH of the boards, and that included an extra roll of ribbon I didn't use, as well as the Fabri-Tac which I can use for future projects. Compare that to the ones I found above and we ended up with way less expensive gifts that are personalized to each girl's tastes. Score. Personally, I think they're even cuter than the ones I found at PB Teen. But I guess I'm kind of biased because I made them. 

0

Pro-craft-ination

Posted by Corrie on 12:18 AM in ,
Alright. I know what you're thinking..."So much for starting that blog and all those projects...they haven't even posted house pictures yet!" Truth be told, our house has pretty much been a complete mess since we moved in and we just haven't had the time to clean it and take nice pictures to show all of you. You know, the ones where our house will look all well put together clean and sort of organized, to make you think that's what it looks like every day. Well that's not what it looks like every day, and half our stuff still isn't in a permanent place, which is exactly why the pictures don't exist yet.
While we have already worked on a few projects to share with you - coming soon in future posts! (for real this time) - part of the reason we haven't gotten around to pictures is because I have had craft stuff all over our living room slash house. And this is why:


Psych! Not our wedding (you would obviously know about that in advance). Darren's sister, Rachel's wedding! She and her fiance husband got married at Mayfield Country Club this past Saturday. A little background note...When Darren's other sister, Jamie, got married last year, I offered to make all of her escort cards, programs and table numbers as her wedding gift. Rachel liked the idea and asked if I would be willing to do the same for her - which of course, I was. Needless to say, I've had ribbon, paper, and all the other supplies laying all over my living room for the past couple weeks.

Now, being a 'seasoned' DIY wedding crafter...and by seasoned, I mean 'I did this once before for Jamie, my mom is a wedding planner, and I pretend to know how to do stuff'...I already had some knowledge about the amount of time it would take and the cost of supplies that would be necessary for this undertaking. Rachel liked the style of program and escort cards I did for Jamie, which worked wonderfully because I had saved the templates from last time. (You know, always thinking ahead.) I don't know why I never took pictures of the final products, but here are some terrible pictures I found of the samples she ended up going with.

These were definitely not the final products, as you can tell by the inaccurate information on the program. Plus, I ended up color matching the graphics to the paper (using a Panatone color selector in Microsoft Publisher) and making some other alignment edits, etc for the end results. But these at least give you an idea. The escort cards followed a similar theme.

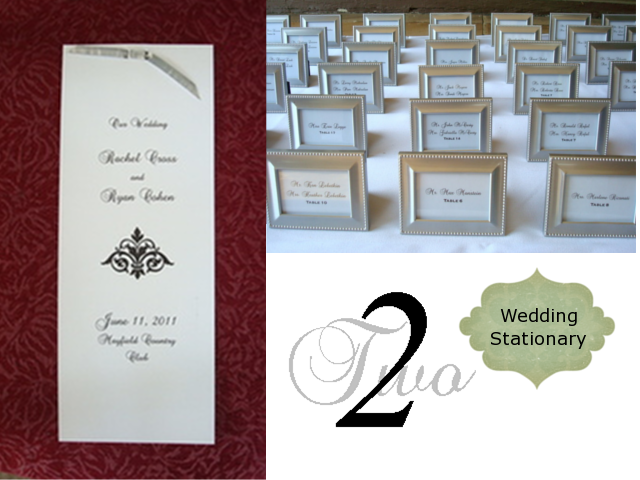
Rachel, on the other hand, wanted something more simple but just as elegant for her reception 'stationary.' Her wedding colors were black, white, and silver and she didn't want anything too graphic-heavy. In fact, she originally wasn't going to do a program, but based off interest from her and Ryan's moms, she decided to go with something very basic.  For the escort cards, she decided to do a combo favor/card by using mini picture frames she found online, which meant easy work for me. Here's how everything turned out:


To make the program, I had created my own template in Microsoft Publisher with dimensions of 4.25"x11" (exact dimensions of a half sheet of regular paper) for Jamie's programs, so I reused that same template to make Rachel's. Each half sheet is considered a 'page,' so I just created two pages (the front and back of the program) and then printed them out double sided on 110lb weight paper, which is a very thick card stock. Since I wanted some fancier font options than what my Mac comes with, I browsed on over to DaFont.com for some sweet free fonts. The script font on the program (as well as the escort frames and table numbers) is called 'Brock Script' and the front graphic is part of a font series called 'Damask Dings.' I just picked a damask image I liked best, super-sized the font in it's own text box, and aligned it with the rest of the text. Ta da! Pretty design.  Oh, and the fancy little 'knot' at the top? Here's a quickie on how I did it:


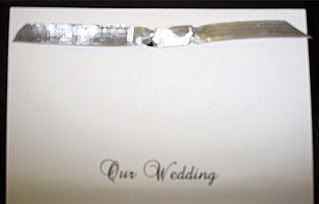
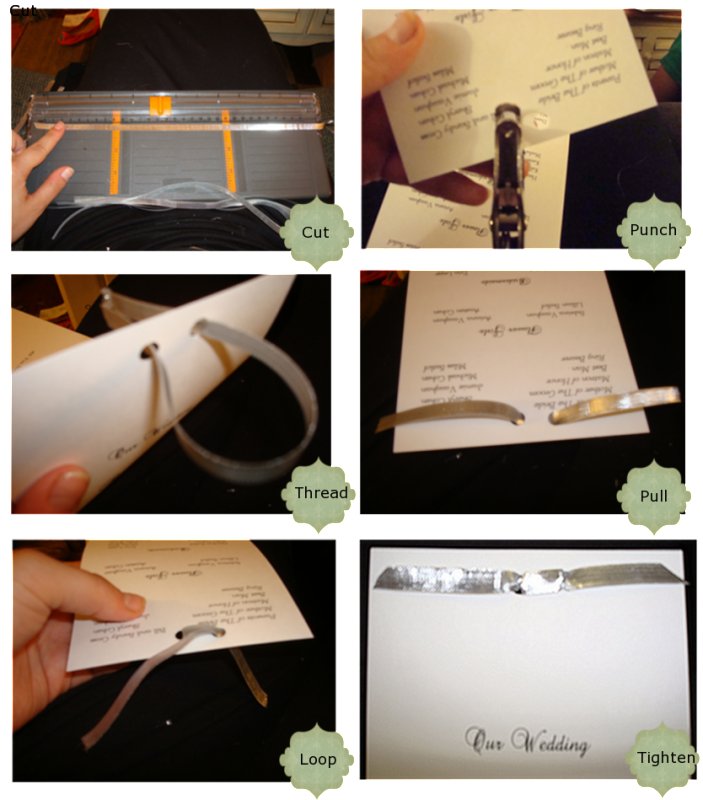
First, I cut pieces of silver ribbon 12" long. Then I punched two holes centered in the top of each program. Starting at the front of the program, I threaded each end of the ribbon through a hole so they would hang out the back of the program. I pulled both ends through, evenly, so the ribbon would be flat up against the front of the program. With the ribbon tails facing upward, I crossed them in an 'X-like loop and inserted them into the opposite holes, pulling them through the front. All that's was left was to tighten the ribbon so it would lay flat on the front, and trim the ends for a nice clean angle. Easy peasy.

For the escort frames, I just made a spreadsheet of all the guest names, sorted them in alphabetical order (to make it easy on myself when I had to display them) and did a mail merge into a 2"x4" label template, which was close to the actual size of the frames. Then it was as simple as printing them on regular paper and cutting them. (Sidenote: The bolder serif font I used is called 'Copperplate.') Rachel bought the frames and dropped them off for me to 'stuff,' so I'm not entirely sure where she ordered them from.
Finally, for the table numbers, I used the same template as the program (since the table number cards were just half sheets of paper folded in half to make 'tents'). Then I made separate text boxes for the number and the word in the lower half of the template. This made it easier to align them properly. I grouped them together so they would be one image, then made a copy of the whole thing and rotated it upside down positioned in the upper part of the page. This resulted in mirror image numbers.  When I printed everything out, all I had to do was cut and fold in half to make little self-standing table number 'tents' which could be seen from both sides of the tables. Done and done.
Ok, so this is more than you ever wanted to know about DIY wedding stationary - and probably not even useful to most of you - but it's what has been keeping me busy. And maybe now you enthusiastically know how to tie a fancy ribbon knot. Ok, maybe wishful thinking.

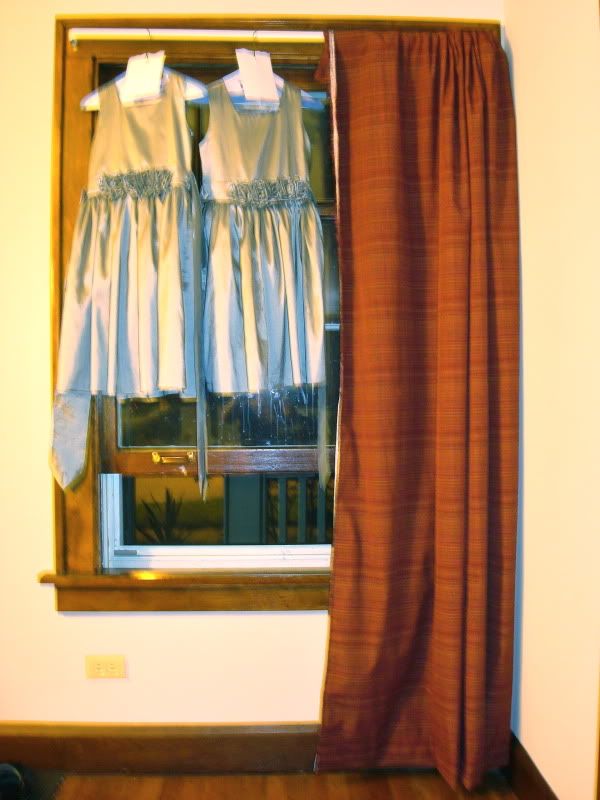
Sidenote: I also hemmed Darren's nieces' flower girl dresses. I won't go into detail, but let's just say I started with this...


Did a little of this...


And ended up with this terribly blurry and out-of-focus night shot...


So there you have it friends. Pro-craft-ination at its finest. And I promise to have some house updates in the next post! 

Copyright © 2009 House Made All rights reserved. Theme by Laptop Geek. | Bloggerized by FalconHive.